Mastering Tool Mounting Plate Installation: Prevent Common Errors and Ensure Security
Introduction to Secure Tool Organization
A secure, efficient tool organization setup starts with a plan that accounts for real-world use—vibration, sudden stops, weather, and daily loading cycles. The goal of tool mounting plate installation is to lock in your layout so nothing shifts, rattles, or steals time on the job.
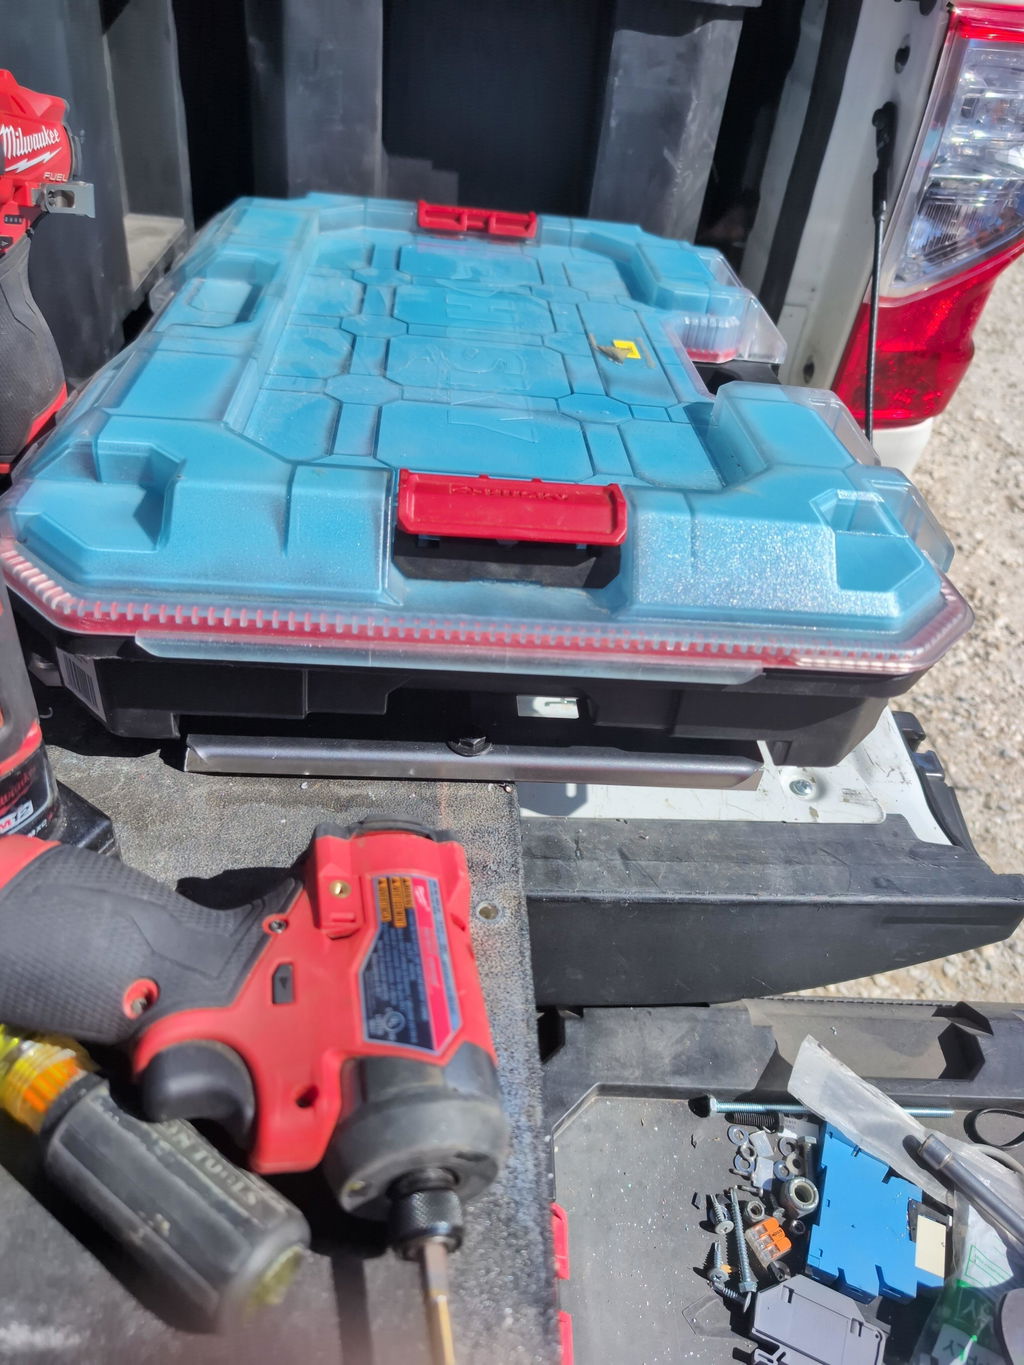
Begin with compatibility and load path. Confirm your plate aligns with your tool system’s hole pattern (e.g., Milwaukee Packout) and verify the base material (steel bulkhead, van floor, cart top, plywood drawer). Think through how weight transfers to structure under braking and cornering. Low-profile plates keep the center of gravity tight and reduce snag risks around doors and drawers.
Choose hardware for the material, not just the weight:
Thin sheet metal: use rivnuts or plusnuts; plusnuts spread load over a larger area.
Solid steel or aluminum: through-bolts with fender washers or backing plates.
Wood/composites: insert nuts or through-bolts; avoid coarse screws that can loosen with vibration.
Always use threadlocker and locking washers or nylocs where appropriate.
Map the layout before drilling. Dry-fit tools and open every lid/drawer to check clearance. Keep hole centers at least 1.5–2x fastener diameter from edges. Stagger heavy items and anchor tie-down points where you can add a secondary restraint for tall or top-heavy tools.
To prevent installation mistakes:
Don’t over-torque fasteners—this can crush substrates or spin rivnuts.
Don’t ignore load ratings; design for at least a 1.5x safety factor.
Don’t skip surface prep; clean, deburr, and seal exposed metal to prevent corrosion.
Don’t mix dissimilar metals without isolation (use nylon washers) to reduce galvanic corrosion.
Don’t block service access; maintain a clear path to fuses, latches, and drains.
If you fabricate in-house using instant-download DXF files, verify material thickness, kerf, and hole sizes match your fasteners. Cut a quick test in scrap, deburr, and test-fit to the tool system before committing to production. Powder-coated plates offer durable protection; use flat washers to preserve the finish and retighten after the first week of use as hardware seats.
A heavy-duty, low-profile, powder-coated mounting solution, installed with the right hardware and checks, delivers truly secure tool mounting—and fewer headaches on the road.
Why Proper Mounting Plate Installation Matters
Getting tool mounting plate installation right is about more than a clean look—it directly affects safety, uptime, and the lifespan of your storage system. Road vibration, hard braking, and daily handling can multiply loads on a plate. If the base material, hardware, or alignment is off, you’ll see loosening fasteners, latch misalignment, rattles, and in worst cases, a full detachment.
Start with the structure you’re mounting to. Through-bolt into solid substrates whenever possible. In a service truck bed, that means using bolts with large fender washers or a backing plate under the sheet metal to spread the load. In vans, thin body panels benefit from rivnuts plus a backing strip or Unistrut to prevent pull-through. On shop walls, anchor into studs or a plywood backer board, not just drywall. For plywood, 3/4 in Baltic birch holds threads well with T-nuts; for steel, consider welded nuts or rivnuts sized to the hardware.
Hardware choice matters for secure tool mounting. Use quality, properly graded fasteners (e.g., Grade 8/10.9 for high-stress points). Add large-diameter washers to protect powder coat and distribute force. Apply medium-strength threadlocker on bolts subject to vibration and use nylon-insert lock nuts where you can access the back side. Avoid over-torquing—crushing the plate can distort latch geometry and crack coatings; follow fastener torque charts for the bolt size and grade.
Alignment is critical to prevent installation mistakes. Plates with precise hole patterns are engineered to locate Packout-style latches accurately; a small skew can cause sticking or incomplete engagement. Dry-fit the cases, check latch action, and ensure clearance for drawers, doors, and neighboring mounts. In tight builds, low-profile plates preserve walkways and door swing while keeping center of gravity low.
Heavy duty mounting tips:
Map load paths; don’t anchor solely to thin sheet metal without reinforcement.
Use stainless or zinc-plated hardware appropriate to your environment; isolate dissimilar metals to reduce galvanic corrosion.
Deburr holes and seal raw edges to prevent rust.
Add rubber isolators or foam tape where needed to damp vibration and eliminate rattles.
Inspect fasteners quarterly; re-torque and replace worn hardware.
Label practical load limits at the point of use to guide your team.
Solid fundamentals in tool organization setup make every trip safer, quieter, and more efficient.
Mistake 1: Inaccurate Measurement and Placement
Small errors at the layout stage lead to misaligned latches, rattling gear, and torn sheet metal. On many systems, even a 1–2 mm (1/16 in) drift will keep the locking tabs from engaging. Treat measurement as the critical first step in tool mounting plate installation.
Start with a reliable datum
Pick one reference edge or a centerline and measure everything from it. Do not mix references.
Verify the surface is level and flat; shim or add a sub-plate if the panel is crowned (common on van walls and service body doors).
Avoid measuring from molded plastic radii or textured surfaces. Use a straightedge and mark on painter’s tape for readability.
Use the plate’s hole pattern accurately
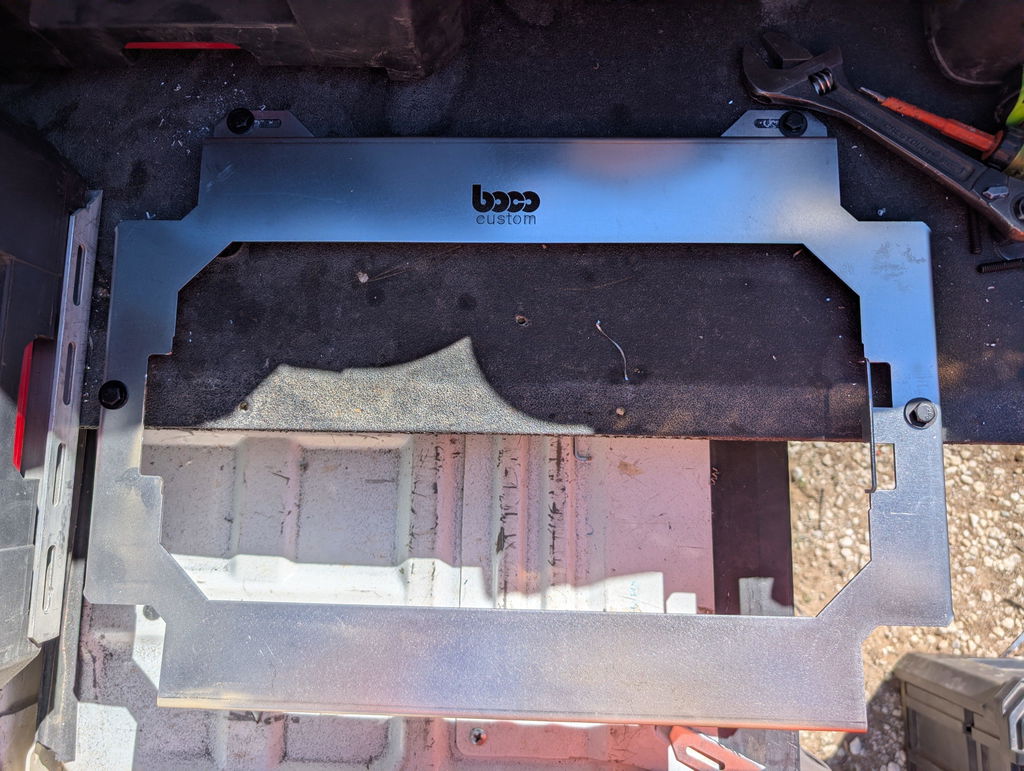
If you have a DXF, print a 1:1 template (check the print with a caliper) and use it as a drill guide. BocoCustom DXFs make this quick and repeatable.
Confirm square by checking diagonals on your marks; diagonals must match.
Typical clearances: 1/4-20 bolts use a 5/16 in (8 mm) hole; M6 uses 7 mm. This provides enough wiggle without weakening the panel.
Maintain edge distance at least 1.5× the hole diameter to prevent tear-out on thin sheet.
Locate structure, not just skin
In vans and boxes, find ribs, Unistrut, or framing and align the plate so fasteners land in structure, not unsupported sheet.
For thin aluminum or composite panels, add a backing plate or large fender washers to spread load and keep mounting secure.
Confirm placement with real-world clearances
Cycle doors, drawers, and lids through their full range. Check for handle interference and latch access with gloves on.
Verify depth: low-profile plates still need space behind for nutserts, bolts, and wiring.
Dry-fit with clamps or Clecos; engage Packout-style latches to ensure they seat smoothly before drilling full size.
Drill and mark with precision
Center punch each hole to prevent bit wander.
Start with pilot holes; step up to final size.
Consider slotting one hole (along the long axis) to allow 1–2 mm of adjustment on heavy-duty setups.
Final check
Measure X, Y, and both diagonals again. If you’re out more than 1 mm, correct before committing. This simple discipline will prevent installation mistakes and deliver secure tool mounting that stays tight under vibration and load.
Mistake 2: Choosing Suboptimal Mounting Hardware
Grabbing whatever screws are on hand is one of the fastest ways to compromise a tool mounting plate installation. The plate is only as strong as the hardware and substrate that hold it. Selecting the right fasteners, materials, and retention methods is essential for secure tool mounting in vehicles, shops, and jobsite carts.
Match fastener size and grade to the plate and load. Use the largest diameter the plate holes are designed for, and choose appropriate strength:
Imperial: Grade 5 or 8 bolts for higher loads; avoid generic low-strength screws.
Metric: 8.8 or 10.9 class for structural connections.
Stainless (18-8/A2 or 316) resists corrosion but is lower in tensile strength than alloy steel; use where corrosion dominates and loads are moderate.
Get the length and engagement right. Aim for thread engagement of at least 1–1.5x the bolt diameter in metal, and use through-bolting whenever possible. Avoid short bites, stripped rivnuts, and fasteners that bottom out before clamping the plate.
Choose hardware for the substrate:
Plywood/composite: Through-bolt with large fender washers or a steel backing plate under the panel. T-nuts or threaded inserts work for removable setups; ensure full seating and use epoxy for soft woods.
Thin sheet metal (vans, drawers): Use rivnuts/nutserts with the correct grip range and a proper setting tool. For high loads, add internal backing plates.
Unistrut/80/20: Use the manufacturer’s T-slot or spring nuts in the correct size and profile; avoid loose nuts that can slip under shock loads.
Aluminum bodies: Prevent galvanic corrosion between stainless hardware and aluminum with nylon/EPDM isolators and primer on bare cuts.
Control vibration and tampering. Use nylon-insert locknuts or all-metal locknuts plus medium-strength threadlocker (blue). Serrated flange nuts improve clamp load; avoid split lock washers, which lose effectiveness under vibration. Where theft is a concern, use tamper-resistant Torx/Hex.
Illustration for Mastering Tool Mounting Plate Installation: Prevent Common Errors and Ensure Security
Head style matters. Countersunk or low-profile button heads keep surfaces snag-free. Protect powder coat by deburring holes, using flat washers under hex heads, and avoiding over-torque that can crush coatings.
Corrosion-proof the install. Deburr and seal drilled holes with primer/paint in steel. Apply anti-seize with stainless hardware to prevent galling.
Quick hardware checklist to prevent installation mistakes:
Correct diameter/grade matched to plate callouts
Proper grip length and thread engagement
Substrate-appropriate anchors or backing plates
Locking method and threadlocker
Corrosion and isolation measures
Boco Custom plates are engineered for heavy-duty, low-profile installs. Reference the product specs and hole patterns, or use the provided DXF files to fabricate matching backing plates and brackets for a cleaner, stronger tool organization setup—exactly the kind of heavy duty mounting tips that keep your system secure.
Mistake 3: Overtightening or Undertightening Fasteners
During tool mounting plate installation, fastener torque is not a guesswork step. Both overtightening and undertightening create problems you’ll feel on the road and see in accelerated wear.
Overtightening can crush powder coat, deform low-profile plates, and dish thin substrates. On plastic tool boxes or polymer rails, it can crack bosses or imprint the surface. On vehicle sheet metal, it can oil-can the panel, changing alignment and reducing pull-out strength. It also increases the risk of galling stainless hardware and stripping inserts or rivnuts.
Undertightening invites vibration, rattle, and fretting. Holes elongate, coatings wear through, and hardware backs out. That compromises secure tool mounting and can lead to tool loss or latch misalignment in your tool organization setup.
Use this process to prevent installation mistakes:
Select the right hardware
- Match bolt grade to the load and plate material; avoid mixing soft screws with high-strength plates.
- Size length so 2–3 full threads show past the nut; avoid bottoming in blind holes.
- Use flat or fender washers on plastics/composites to spread load; protect powder coat with washers.
- Prefer nyloc nuts or serrated flange nuts for vibration resistance.
Apply controlled torque
- Start all fasteners by hand to prevent cross-threading; snug everything finger-tight first.
- Tighten in a cross or star pattern to pull the plate down evenly.
- Use a torque wrench, not an impact, for final torque. As a general reference (verify for your hardware and substrate):
- M6 class 8.8 into steel: about 7–10 N·m (62–88 in·lb).
- 1/4-20 UNC Grade 5: about 8–12 N·m (70–105 in·lb).
- If threading into aluminum or thin sheet with rivnuts, stay at the low end to avoid spin-out.
Treat threads appropriately
- Use medium-strength (blue) threadlocker on clean, dry metal-to-metal threads; avoid on plastics.
- Apply anti-seize on stainless-to-stainless to prevent galling.
Verify and maintain
- Check alignment of latches and sliding interfaces before final torque.
- After the first week of use or 50–100 miles of driving, re-torque. Add torque-stripe paint for quick visual checks.
Example: Mounting a heavy-duty low-profile plate to a Packout-style base with four M6 bolts, flat washers, and nyloc nuts—snug all four, align, then torque in a star pattern to ~8 N·m. The result is secure tool mounting without crushing the substrate or loosening under vibration—precisely what you want from heavy duty mounting tips.
Mistake 4: Disregarding Surface Material Compatibility
Ignoring what you’re mounting to is a fast way to end up with loose hardware, distorted panels, or corrosion. Tool mounting plate installation should always start with identifying the substrate and matching the fastener strategy to it. The plate may be heavy-duty and low-profile, but the surface dictates how secure tool mounting will be over time—especially in vehicles where vibration amplifies forces.
Illustration for Mastering Tool Mounting Plate Installation: Prevent Common Errors and Ensure Security
Common surfaces and what works:
Thin vehicle sheet metal (vans, service bodies)
- Use rivnuts/plusnuts or through-bolts with a backing plate, not coarse sheet-metal screws that can loosen.
- Spread the load with large fender washers or a custom backing plate to avoid “oil canning.”
- Deburr and prime drilled holes; seal with seam sealer to prevent rust and water ingress.
- Consider threadlocker and nylon-insert lock nuts for vibration resistance.
Plywood or wood studs
- Lag screws or through-bolts are appropriate; pre-drill pilots to prevent splitting.
- Use wide washers; if the plywood is thin, add a secondary plate behind it.
- Avoid placing fasteners near edges; keep consistent edge distance.
Composites and thin plastics (interior liners, honeycomb panels)
- Choose plusnuts or large-flange blind rivets with high grip range.
- Always add a reinforcement plate to prevent crushing or creep.
Unistrut/T-slot extrusion
- Use channel/T-nuts sized to the slot and proper grade bolts.
- Verify torque recommendations and use spring channel nuts or serrated washers to resist vibration.
Concrete/masonry (shop walls)
- Use wedge anchors, sleeve anchors, or concrete screws rated for the load.
- Drill proper diameter and depth; clean holes to full depth before setting anchors.
- Respect edge distances and spacing to avoid cracking.
Account for corrosion and dissimilar metals. Stainless hardware in aluminum can galvanically corrode; isolate with nylon or fiber washers and apply anti-seize. Powder-coated plates help, but any exposed steel should be primed after drilling.
Plan for dynamic loads. A tool organization setup in a vehicle sees shock loads; choose anchors and spacers with a conservative safety margin and re-torque fasteners after initial use.
Heavy duty mounting tips: If you encounter unusual ribs or offset surfaces, fabricators can use Boco Custom’s instant-download DXF files to create matching backing plates or brackets, ensuring full contact and load distribution.
Quick check:
Identify substrate
Select matching anchor/fastener
Distribute load with backing
Isolate dissimilar metals
Seal penetrations
Verify, torque, and re-check after use to prevent installation mistakes
Mistake 5: Neglecting Pilot Holes and Proper Alignment
Skipping pilot holes and eyeballing alignment are two of the fastest ways to compromise a tool mounting plate installation. Without a pilot, screws can wander, split plywood, or snap in sheet metal. Misaligned holes force the plate to sit in a bind, opening the door to vibration, fastener loosening, and premature wear—especially with heavy loads.
Size pilots to the fastener and the material. For wood screws, use a pilot roughly the root diameter of the screw: about 70–75% in hardwoods and 80–90% in softwood or plywood. For sheet metal with self-drillers, pre-punch and let the screw cut its own threads, or use a small pilot 1–2 sizes under the major diameter if the steel is tough. For machine screws with rivnuts/nutserts, drill exactly to the insert’s spec—don’t guess.
Heavy duty mounting tips for clean pilots:
Mark hole centers with a center punch or transfer punch so the bit won’t skate.
Use brad-point bits in wood; cobalt or titanium-coated bits for steel, slow speed with cutting oil.
Set a depth stop or tape flag to avoid blowing through cabinetry or hidden wiring.
Deburr and seal bare metal holes with primer to prevent rust; in wood, a dab of thin CA glue can harden soft fibers.
Alignment is just as critical for secure tool mounting. Reference off straight edges, not soft surfaces. Pull two diagonal measurements; when they match, the plate is square. Clamp the plate in position, verify latch/slot clearances, then mark holes. If installing multiple plates in a tool organization setup, create a master layout line or jig so spacing stays consistent across the run.
Practical examples:
Illustration for Mastering Tool Mounting Plate Installation: Prevent Common Errors and Ensure Security
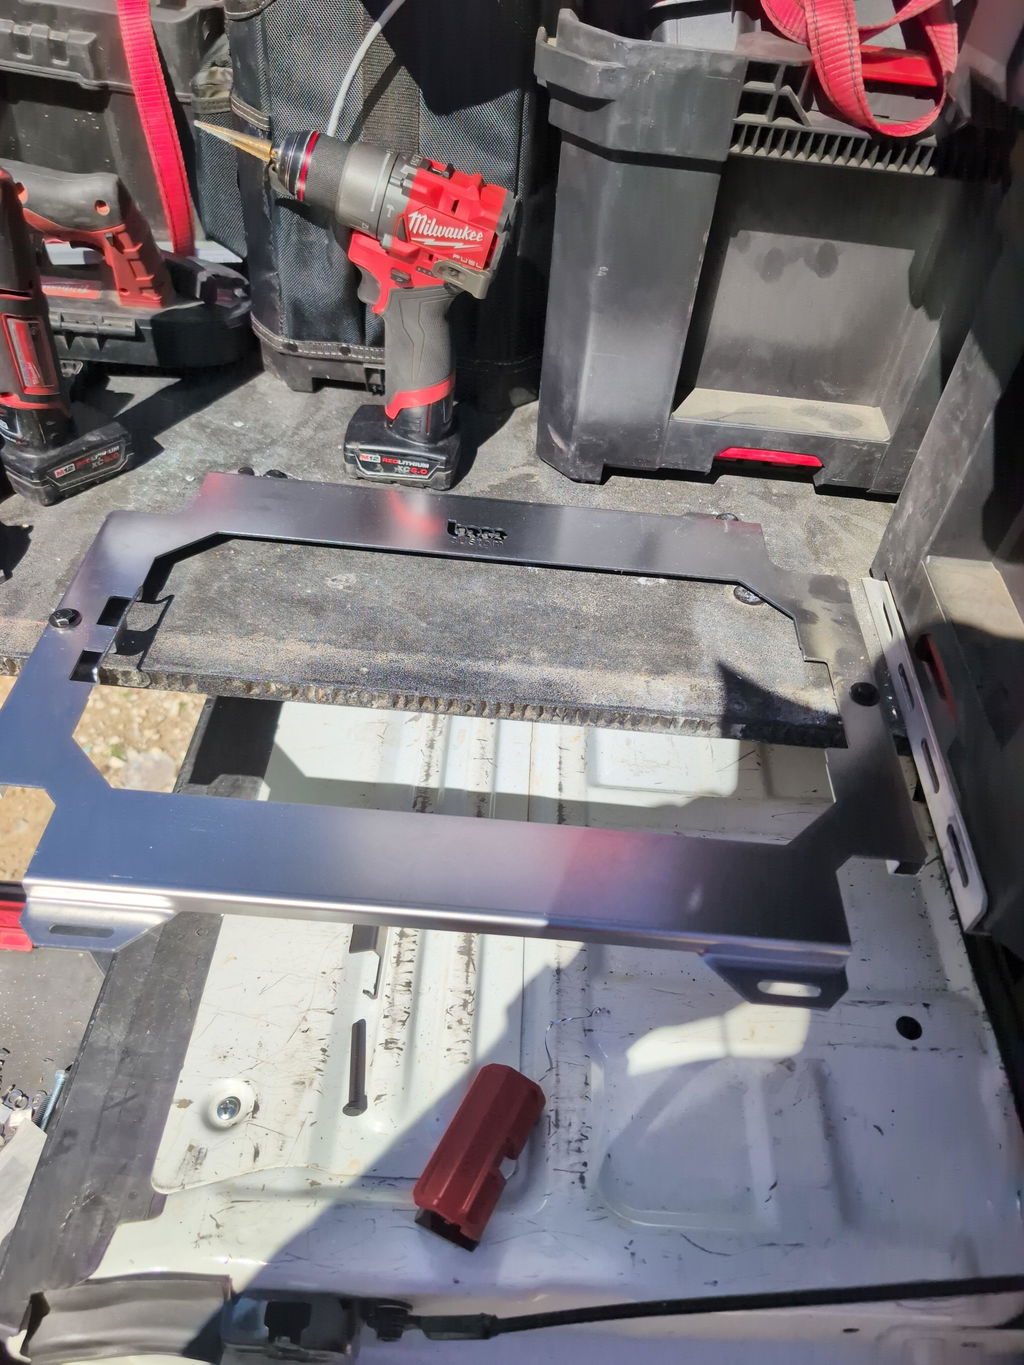
3/4 in. plywood deck: Clamp the plate, confirm alignment to the deck edge, mark with a transfer punch, drill 1/8 in. pilots, then upsize if using through-bolts. Use fender washers and nylock nuts underneath. The plate should draw down flush without racking.
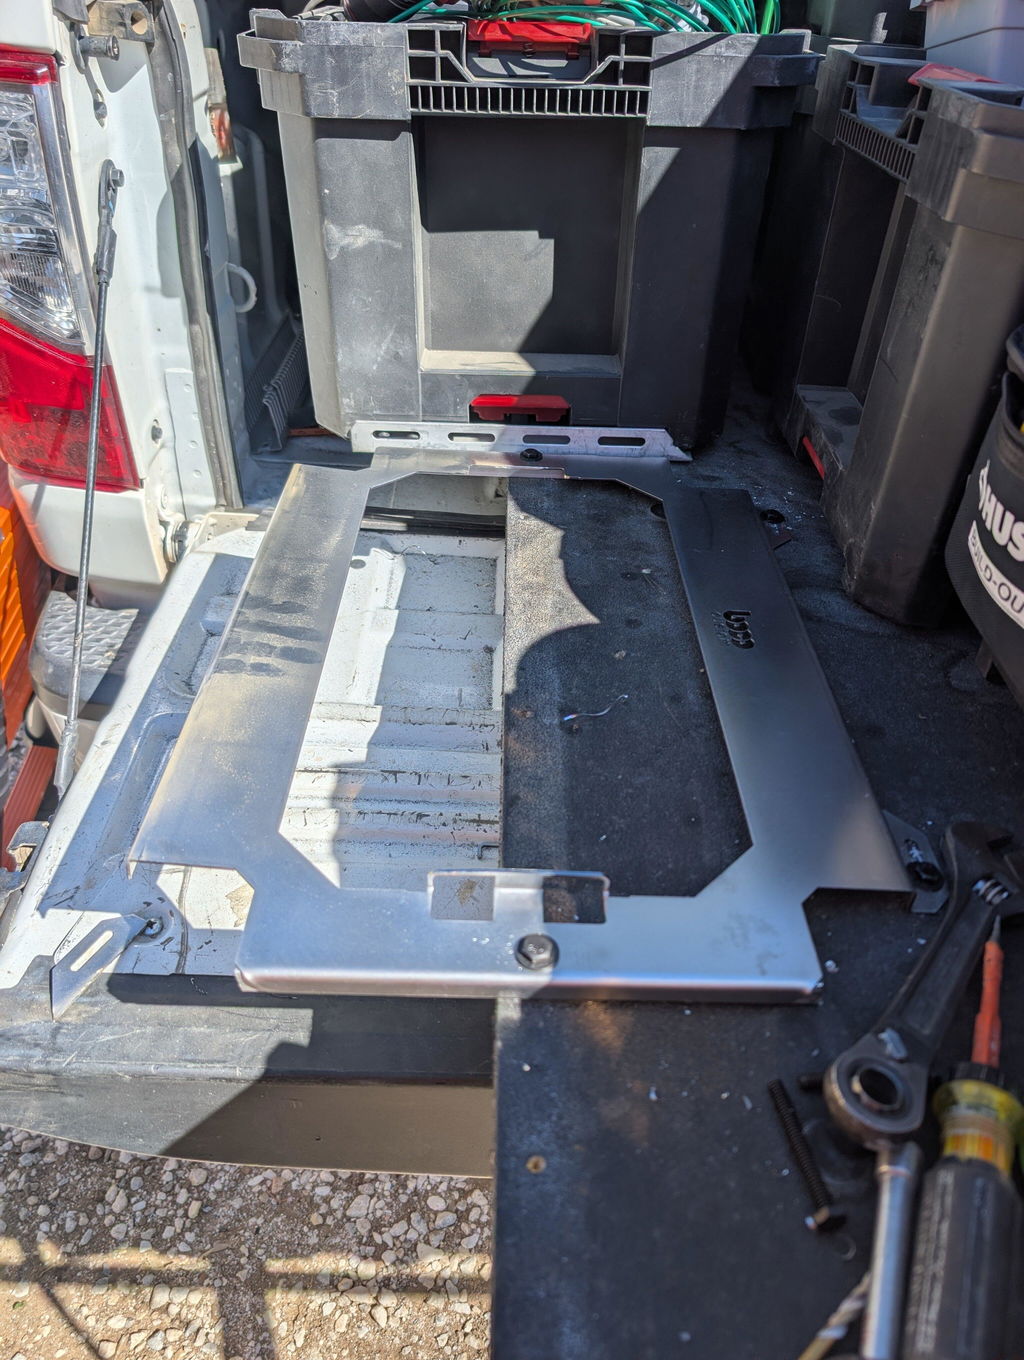
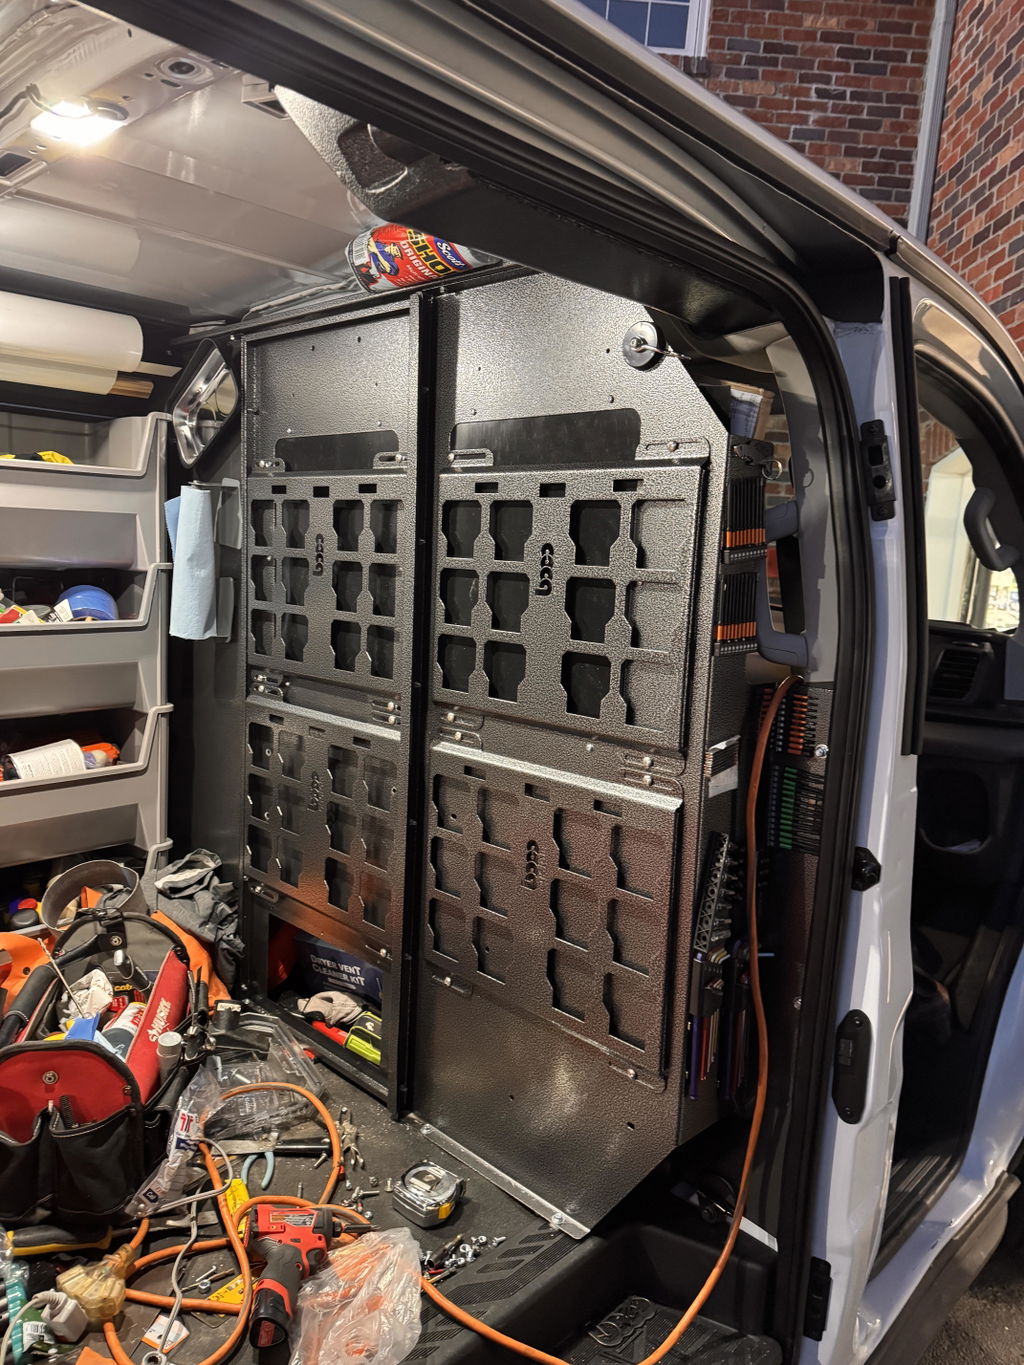
Van bulkhead (sheet steel): Use a template or the plate as a guide, center punch, drill to the rivnut’s spec (e.g., 17/32 in. for 5/16-18 steel inserts), set rivnuts, then fasten with machine screws and threadlocker.
Avoid “chasing” misalignment by enlarging the plate’s powder-coated holes. Adjust the substrate instead. For repeatable accuracy, use Boco Custom’s DXF files to laser-cut drill templates or backers that eliminate guesswork and prevent installation mistakes. Before loading tools, dry-fit, tighten to firm plus a quarter-turn, and recheck alignment under load.
Best Practices for Flawless Installation
Start with a plan. Map your tool organization setup on the actual surface before drilling. Use painter’s tape to outline the plate, verify door/drawer clearances, and confirm latch access for systems like Milwaukee Packout. Print 1:1 templates from DXF files when available to mark hole locations precisely.
Verify the substrate. The strength of the install is only as good as what you mount to:
Sheet metal (vehicle walls/doors): Use rivnuts (nutserts) or backing plates; avoid self-tapping screws for heavy loads.
Plywood/composite panels: Hit structural ribs or add a backer; use through-bolts with fender washers.
Steel tops/carts: Through-bolt where possible; if tapping threads, ensure adequate material thickness and thread engagement (at least 1.5x bolt diameter).
Choose the right hardware. For secure tool mounting, use:
Grade 8 or Class 10.9 bolts for heavy-duty mounting tips; stainless for corrosion resistance (apply anti-seize to prevent galling).
Nylock nuts or medium-strength threadlocker on mobile installations to prevent loosening from vibration.
Large-diameter washers or backing plates to spread load on thin materials.
Nylon or rubber isolators between dissimilar metals to prevent galvanic corrosion; add nylon washers to protect powder coat.
Lay out and drill cleanly. Center-punch each hole, drill a pilot, then step up to final size. Keep edge distance at least 1.5x the fastener diameter and spacing at least 2x to preserve strength. Deburr holes and seal exposed metal with primer/paint to stop rust.
Protect the finish. Powder-coated plates are durable; avoid clamp jaws or tools that can gouge the coating. Touch up any scratches promptly.
Torque with care. Use a torque chart for your fastener size/grade and substrate. Tighten evenly in a crisscross pattern so the plate seats flat without distorting the surface. Do not crush composite panels—use spacers if needed.
Load-test the setup. Before hitting the road, mount a representative tool load and check for deflection, rattles, or fastener pull-through. Re-torque after the first day of use.
Prevent installation mistakes by checking what’s behind the surface (wiring/airbags), keeping holes square, and verifying weight distribution so heavy tools sit low and centered. A precise, methodical tool mounting plate installation yields a stable, low-profile system that stays secure under daily professional use.
Ensuring Long-Term Security and Durability
Long-term security begins with the substrate and load path. Treat tool mounting plate installation like a mobile structure: vibration, braking, and road shock multiply real loads. Anchor into structural members whenever possible—truck bed ribs, drawer system frames, or reinforced plywood—rather than thin skins or plastic panels. When mounting to thin sheet metal, use a backing plate (e.g., 1/8–3/16 in steel or aluminum) to spread the load and prevent “oil canning.”
Distribute forces. Use all available anchor points on the plate, not just the corners. Avoid cantilevers—keep heavy toolboxes centered over supports. For a Packout-style setup on a van deck, four bolts into threaded inserts in 3/4 in Baltic birch or rivnuts in steel framing provides far better retention than wood screws into OSB.
Choose hardware deliberately. Match fastener grade and thread type to the plate and substrate; don’t mix metric and SAE. Aim for thread engagement of at least 1× fastener diameter in steel (1.5× in aluminum or wood inserts). Use nylon-insert lock nuts or medium-strength threadlocker on bolts that see vibration. If using stainless hardware, apply anti-seize to prevent galling and consider nylon or fiber washers between stainless and aluminum to reduce galvanic corrosion.
Protect the finish. Powder-coated plates resist wear, but any field-drilled holes or chips should be de-burred and touched up to prevent rust creep. Avoid drilling close to edges; maintain at least 2× hole diameter from any edge to prevent tear-out.
Plan the tool organization setup for stability. Place the heaviest cases low and near the center of the vehicle or cart. Ensure latch and slide clearances are maintained so cases lock fully—partial engagement is a common way plates get stressed and fasteners loosen. For harsh-service routes or off-road, add secondary retention like straps or tethers.
To prevent installation mistakes, verify load ratings of the plate, substrate, and fasteners as a system. If using rivnuts, match grip range to material thickness to prevent spin-out. Where permitted, a thin rubber isolator between plate and substrate can reduce vibration without compromising rigidity.
Establish a quick maintenance routine:
After 50–100 miles of use, re-check torque on accessible fasteners.
Monthly: inspect for powder-coat chips, corrosion, and loosening; retighten as needed.
Quarterly: verify rivnuts or inserts aren’t spinning and that backing plates remain flush.
Annually: replace any hardware showing thread damage or corrosion.
For fabricators, using precise DXF hole patterns helps maintain alignment, preserves low-profile strength, and reduces rework—key to secure tool mounting over the long haul.
Conclusion: Maximizing Efficiency with Secure Tools
Solid tool mounting plate installation pays you back every day in faster access, quieter rides, and fewer lost or damaged tools. Treat it like any other critical fit-up: plan the layout, select the right hardware, and verify the load path before you tighten a single bolt.
Use these heavy duty mounting tips to lock in long-term reliability:
Map load and vibration. Place the heaviest items low and near structural anchor points. Keep fasteners out of thin skins; use backing plates on van panels, drawers, or plywood.
Choose proper hardware. Grade 8 (SAE) or 10.9 (metric) bolts, washers under both head and nut, and nyloc nuts or medium-strength threadlocker for secure tool mounting.
Isolate and protect. Add rubber or nylon spacers to prevent galvanic corrosion between dissimilar metals; seal penetrations to keep out moisture; deburr holes.
Align and torque. Clamp and pilot-drill to avoid slotting holes. Torque in a cross pattern, then recheck after the first week of driving or jobsite use.
Proof test. Perform a “bounce test” and a hard tug on each mount. Nothing should shift, rattle, or show paint witness marks around fasteners.
Example: Mounting a Packout plate on a van wall? Skip self-tappers into thin sheet. Install rivnuts into reinforced ribs or add an interior doubler plate that spreads the load across a larger area. If the wall isn’t flat, shim to eliminate twist so the plate sits flush and locks evenly.
To prevent installation mistakes, document your tool organization setup: note torque values, hardware types, and mounting locations. Label bays so items always return to the same spot. After two weeks, audit fasteners and listen for new rattles; adjust before minor issues become failures.
Boco Custom’s powder-coated, low-profile plates are engineered for major systems and everyday abuse, helping you standardize mounts across trucks, carts, and shops. Need a one-off bracket or bulkhead fit? Download Boco Custom DXF files for precise fabrication, then match finishes for corrosion resistance. Same-day shipping and local pickup keep projects on schedule, while custom metal signs and labels make identification effortless.
Secure tool mounting isn’t just about safety—it’s a force multiplier for productivity. Install once, verify often, and your setup will move as fast as you do.
Standard shipping takes 5 to 7 business days. Express (2 to 3 days) and overnight options are available at checkout. Orders over $50 ship free.
Can I order online and pick up in store?
Yes. Select "Pick up in store" at checkout and choose your nearest location. Most orders are ready within 2 hours.
What if my order arrives damaged?
Contact us within 7 days of delivery with your order number and a photo. We'll arrange a replacement or refund, no return shipping required.
AI-Generated Content Disclosure
This blog post was created with the assistance of RankGPT, an AI-powered tool designed to generate high-quality, SEO-optimized content at scale.
As a small business embracing modern technology, we use AI to help us:
Produce informative articles more efficiently
Increase our online visibility through better performance in traditional search engines (like Google) as well as emerging AI-powered searches and answer engines
Reach more potential customers and grow our presence in a competitive digital landscape
By leveraging tools like RankGPT, we're able to publish valuable content more consistently and scale our efforts in ways that would otherwise take significantly more time and resources.
Important notes for readers:
While RankGPT helps create well-structured and relevant content based on current best practices, AI-generated posts are not always 100% accurate, complete, or free from errors.
The information, opinions, and perspectives expressed may not fully reflect the exact views, experiences, or official positions of Boco Custom, its team members, or the individuals involved in our business.
AI content should be viewed as a starting point or general resource—not as personalized professional advice, definitive facts, or a substitute for direct consultation with us or qualified experts.
We always recommend verifying important details independently, especially for decisions related to custom products, services, or any business matters.
We are committed to transparency and continually work to improve our content. If you have questions, feedback, or spot any inaccuracies, please reach out—we genuinely appreciate it!
Not only is this way overbuilt for the price with its solid, confident craftsmanship, I am completely convinced that these guys are the best around when it comes to the packout platform.
I like these, they are much more compact than what Milwaukee offers. I had them powder coated in silver vain and they look awesome. I love the bonus half rack they sent me. That’s the mark of a nice company.


Dejar un comentario