Achieve Ultra-Secure Tool Organization: Best Practices for Mounting Plates in Service Vehicles
Introduction to Secure Tool Storage
Every mile your service van or truck drives becomes a stress test for your gear. Sudden stops, potholes, and off-camber sites multiply forces on brackets and bins. The goal of secure mounting plate installation is to keep heavy tools locked down, accessible, and quiet—without wasting space or adding height that interferes with drawers, doors, or cargo.
Start by choosing plates engineered for the specific tool ecosystem you use. Low-profile, heavy-duty mounting plates that match popular bolt patterns (for example, Milwaukee Packout footprints) eliminate slop and rattle, while powder-coated finishes resist corrosion in wet or salty environments. Look for close-tolerance holes and reinforced tie-in points so you can add secondary straps where needed.
Mounting location matters. Keep mass low and forward to protect handling and braking. In vans, the floor and bulkhead are ideal; on service bodies and pickup beds, tie into crossmembers rather than thin sheet metal. Before drilling, map underfloor ribs, wiring, and fuel lines. In high-use areas like side doors, verify the plate won’t snag workwear or block ladder access.
Hardware makes or breaks tool mounting solutions:
Use high-strength fasteners (e.g., Grade 8 SAE or 10.9 metric) with large-diameter washers or backing plates to spread load.
Favor rivnuts/plusnuts where you can’t access the backside, but reinforce thin panels with doubler plates.
Apply threadlocker and torque to spec; consider nyloc nuts for vibration resistance.
Add rubber or UHMW isolators between dissimilar metals to reduce galvanic corrosion and noise.
For professional tool storage in motion, build in redundancy. Many crews add a secondary restraint—straps or locking latches—around the heaviest cases. Label positions so every bin returns to the same spot. A consistent layout speeds inventories and reduces forgotten tools on site.
Two practical examples:
Transit/Sprinter bulkhead: A low-profile plate through-bolted with backing plates across structural ribs keeps Packout stacks tight against the wall, opening floor space for conduit and ladders.
Pickup bed service drawer: A plate aligned to the drawer’s subframe, fixed with rivnuts into the bed’s crossmembers, prevents fore-aft creep on washboard roads while preserving drawer slide clearance.
Fabricators who need custom brackets for unique vans or shelving can accelerate jobs with instant-download DXF files. Cutting from a precise file ensures fasteners land on structure, hole spacing stays accurate, and the final assembly remains square—critical for a mobile workshop setup that must survive daily abuse.
Regularly inspect fasteners, listen for new rattles, and recheck torque after the first week of service. Small adjustments keep heavy duty mounting secure and extend the life of your storage system. When time is tight, having ready-to-ship plates or local pickup options keeps your vehicle organization tips moving from plan to pavement quickly.
Selecting the Ideal Mounting Plate
Start by matching the plate to your tools and vehicle. The ideal platform is low-profile to preserve cargo space, yet rigid enough to handle bumps, braking, and daily wear. For professional tool storage, prioritize heavy duty mounting that resists vibration, keeps latch mechanisms aligned, and prevents rattle.
Choose materials and construction that fit the environment. Steel plates offer high stiffness in compact profiles, while aluminum saves weight in high-roof vans. Look for formed flanges, gussets, or ribbing that increase rigidity without adding height. A powder-coated finish helps resist corrosion from moisture and road salt, extending service life in work trucks and trailers.
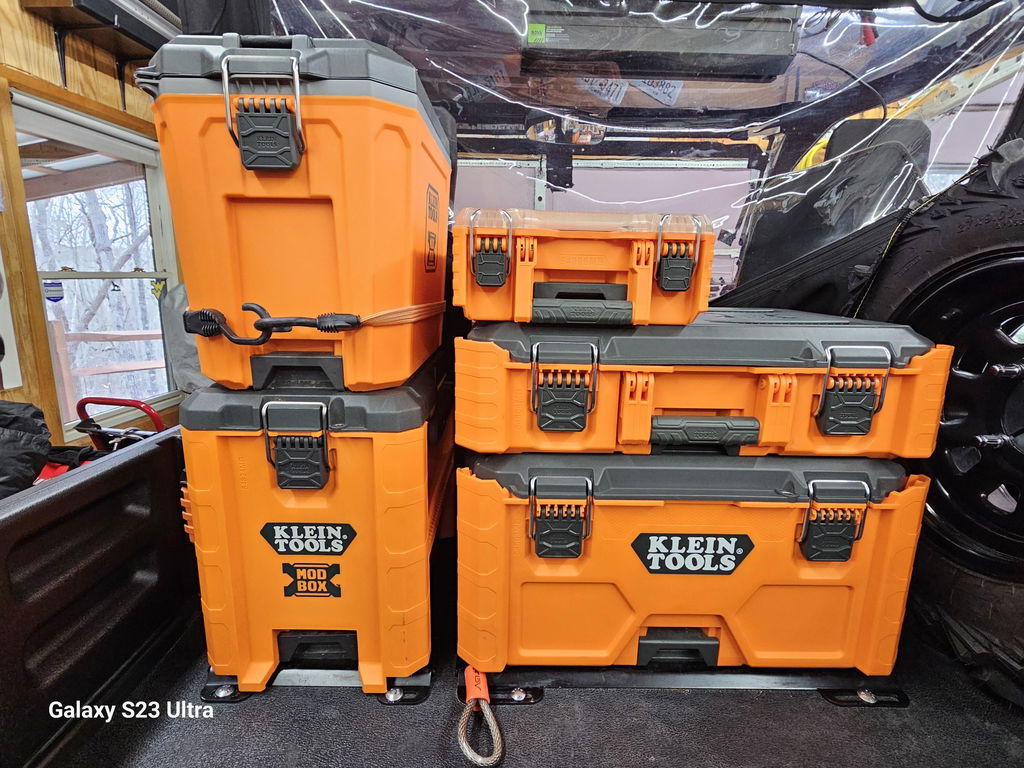
Confirm pattern compatibility with your system. If you run Milwaukee Packout or other modular boxes, use plates with precise, pre-drilled hole patterns and keyed features that lock modules in place. This reduces install time and ensures repeatable, secure mounting plate installation across multiple vehicles or crews. When mixing brands or adding custom fixtures, select plates with open-grid hole patterns that accept common fasteners and accessories.
Anchor to structural members, not just thin sheet metal. In vans, tie into factory hard points, frame rails, seat bases, or use large backing plates to spread load over floor ribs. In truck beds and service bodies, span crossmembers and avoid concentrating loads on single ribs. For enclosed trailers, through-bolt into the steel frame under the plywood floor. Example: a Transit van floor plate anchored through factory D-ring points and additional rivnuts with backing plates will outperform screws into plywood alone.
Use proven hardware and techniques:
Grade 8 or 10.9 bolts with nyloc nuts or threadlocker
Rivnuts or plusnuts sized for sheet-metal thickness, installed with proper compression
Large-diameter washers or fabricated backing plates to distribute load
Tamper-resistant Torx or security hardware for theft deterrence
Anti-seize on stainless fasteners to prevent galling
Rubber or UHMW isolators where needed to reduce vibration transfer
Plan the layout like a mobile workshop setup. Keep heavy items low and forward of the rear axle to improve handling. Maintain door and aisle clearances, and leave space for future expansion. For example, mount a dual-plate Packout base on the driver-side floor with a narrow aisle to the bulkhead, and reserve a wall plate for small bins and meters.
If your build is unique, consider fabrication. Instant-download DXF files let you cut plates that follow wheel-well contours, clear tie-downs, or add anchor points for compressors and inverters. Fabricators can waterjet or plasma-cut from these files, then powder-coat for durability and a professional finish.
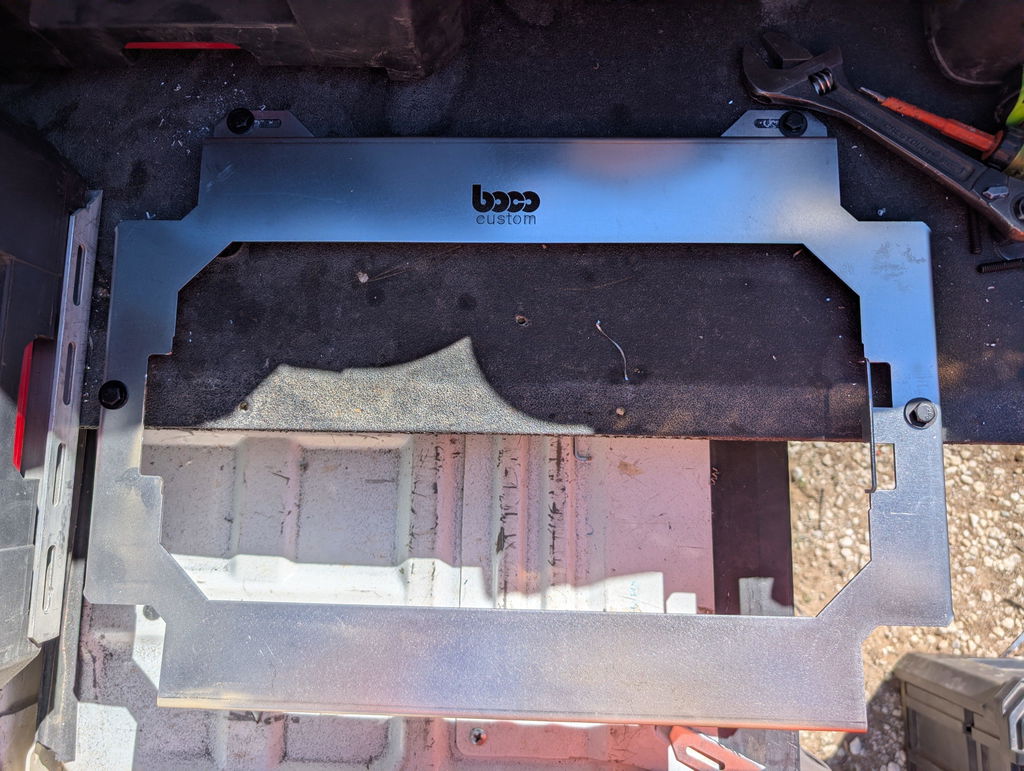
Availability matters when downtime costs money. Choose suppliers that offer same-day shipping, consistent powder-coated finishes, and local pickup when you need a fast turnaround. Companies like Boco Custom provide heavy-duty, low-profile tool mounting solutions for major systems along with precise DXF files, helping pros implement secure, repeatable installations with minimal lead time and maximum reliability.
Pre-Installation Checklist Essentials
Start with a plan. A secure mounting plate installation begins with verifying structure, load paths, and clearances so your mobile workshop setup stays safe and efficient on the road.
Verify structure and load path: Identify whether you’re mounting to the floor, wall, or bulkhead and confirm material type and thickness (steel, aluminum, composite). Reinforce thin panels with backing plates. Aim for crash-load resilience—design for at least 20g forward deceleration of the combined weight of the plate and tools for truly heavy duty mounting.
Map layout and ergonomics: Measure door openings, drawer travel, and aisle width. Keep weight low and centered over the axle, maintain access to service panels and tie-downs, and ensure you can still remove spare tires or reach emergency kits. These vehicle organization tips prevent costly rework.
Confirm compatibility: Match the plate pattern to your chosen tool mounting solutions (e.g., Milwaukee Packout). For low-profile, professional tool storage, verify whether the plate will be used horizontally or vertically and that latch and handle clearances are maintained.
Choose the right fasteners: Use Grade 8 (SAE) or 10.9 (metric) hardware for steel substrates; consider 316 stainless in corrosive environments. Through-bolting with large washers or backing plates provides maximum strength; rivnuts/plusnuts are suitable where backside access is limited. Apply threadlocker where specified, use lock nuts, and torque to spec.
Prevent corrosion and noise: Isolate dissimilar metals (nylon washers or barrier tape) on aluminum bodies to avoid galvanic corrosion. Deburr and prime cut edges, seal penetrations with seam sealer, and add rubber isolators to minimize vibration and rattles.
Protect vehicle systems: Before drilling, remove trim and inspect cavities for wiring, airbags, fuel/DEF lines, sensors, and HVAC ducts. Disconnect the battery when working near airbags or sensitive electronics. Favor OEM tie-down locations when possible.
Use accurate templates: Print 1:1 templates from instant-download DXF files or CNC-cut drill jigs for repeatable hole placement. Pilot drill, step up with sharp bits, then deburr. Preserve powder-coated surfaces; touch up any exposed metal.
Gather tools and PPE: Torque wrench, step bits, quality rivnut tool, calipers, straightedge, level, vacuum/magnet for swarf, and painter’s tape. Wear eye/ear protection and gloves.
Inventory and timing: Confirm plate model, brackets, spacers, and hardware counts before teardown. Coordinate same-day shipping or local pickup with your install window to prevent downtime.
Compliance and safety: Follow cargo securement best practices and any fleet or insurer requirements. Keep fire extinguisher and first-aid access unobstructed, and avoid mounting in known crumple zones.
Dry-fit and validate: Test-fit the plate, verify latch operation and clearances, and simulate loaded conditions. After final install, road-test for noise, recheck fastener torque after 50–100 miles, and document the setup for future service.
Completing this checklist ensures a secure mounting plate installation that supports durable, low-profile, and organized professional tool storage in any service vehicle.
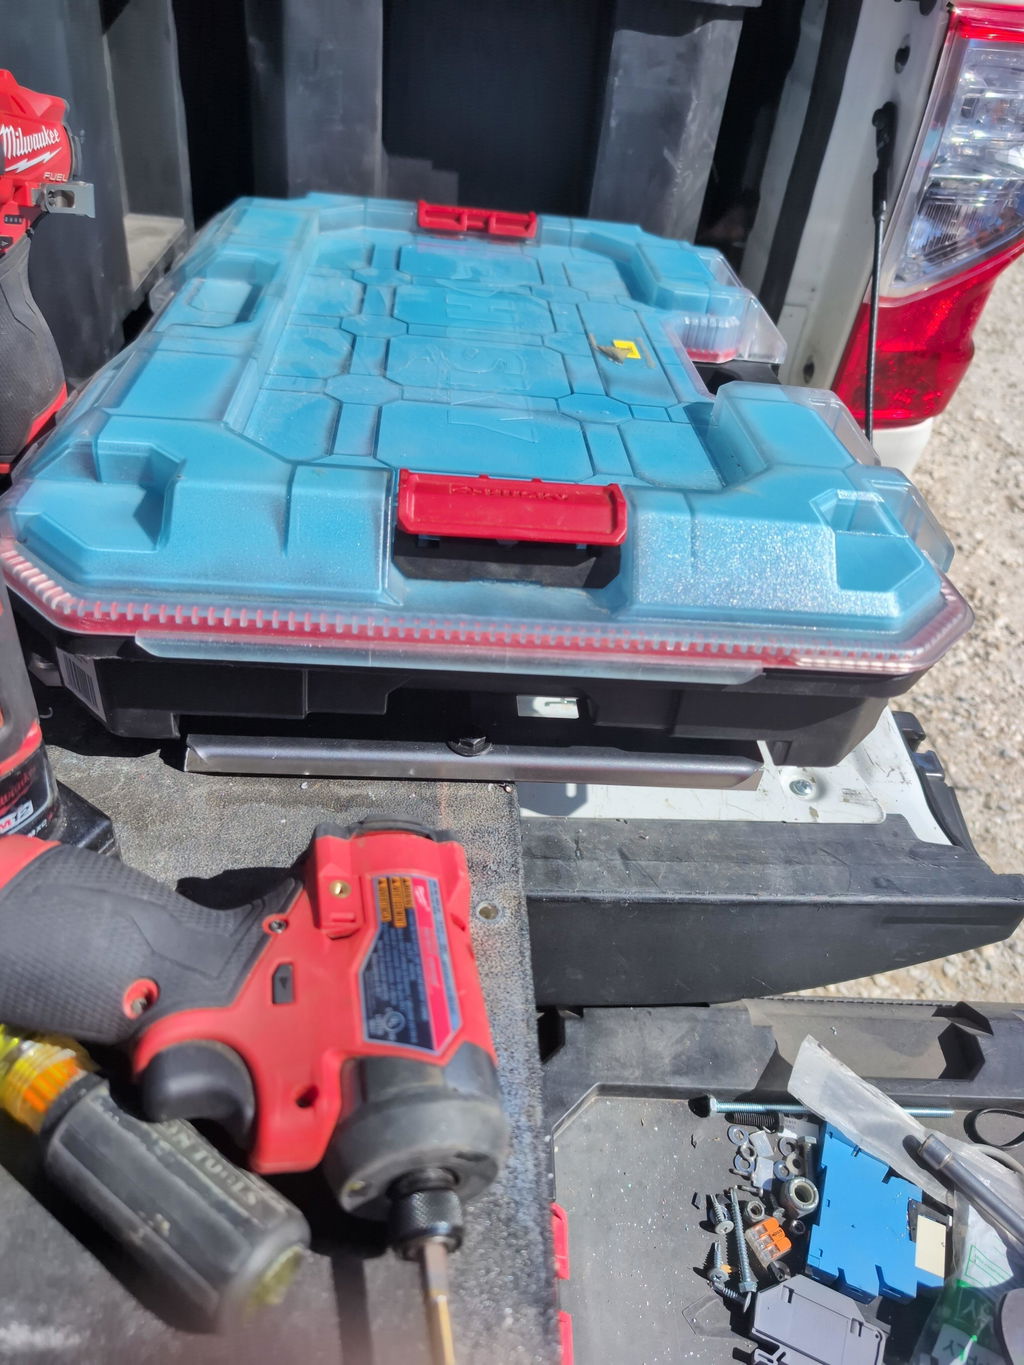
Illustration for Achieve Ultra-Secure Tool Organization: Best Practices for Mounting Plates in Service Vehicles
Optimal Placement within Vehicle
Start placement planning with load paths and structure. For secure mounting plate installation, anchor to reinforced points and keep mass low and forward of the rear axle. This improves handling and reduces tip-over risk in sudden stops.
Key placement considerations:
Weight distribution: Split heavy loads left/right and keep them on the floor. Avoid overloading one side cabinets or rear overhangs.
Access frequency: Put daily-use kits at doorways; archive or specialty tools deeper inside.
Aisle and door clearances: Maintain a clear 18–24 inches of walkway; verify slider and rear door swing arcs before drilling.
Serviceability: Don’t cover battery access, jack points, spare-tire cranks, or fuse panels. Use modular plates so individual zones can be removed.
Vehicle systems: Scan for fuel/brake lines and wiring under floors. Avoid airbag zones and curtain airbag inflators along roof rails.
Vans (Transit, Sprinter, ProMaster)
Floor is the primary structure for heavy duty mounting. Through-bolt plates to the floor with backing plates that span ribs; align fasteners near factory crossmembers where possible.
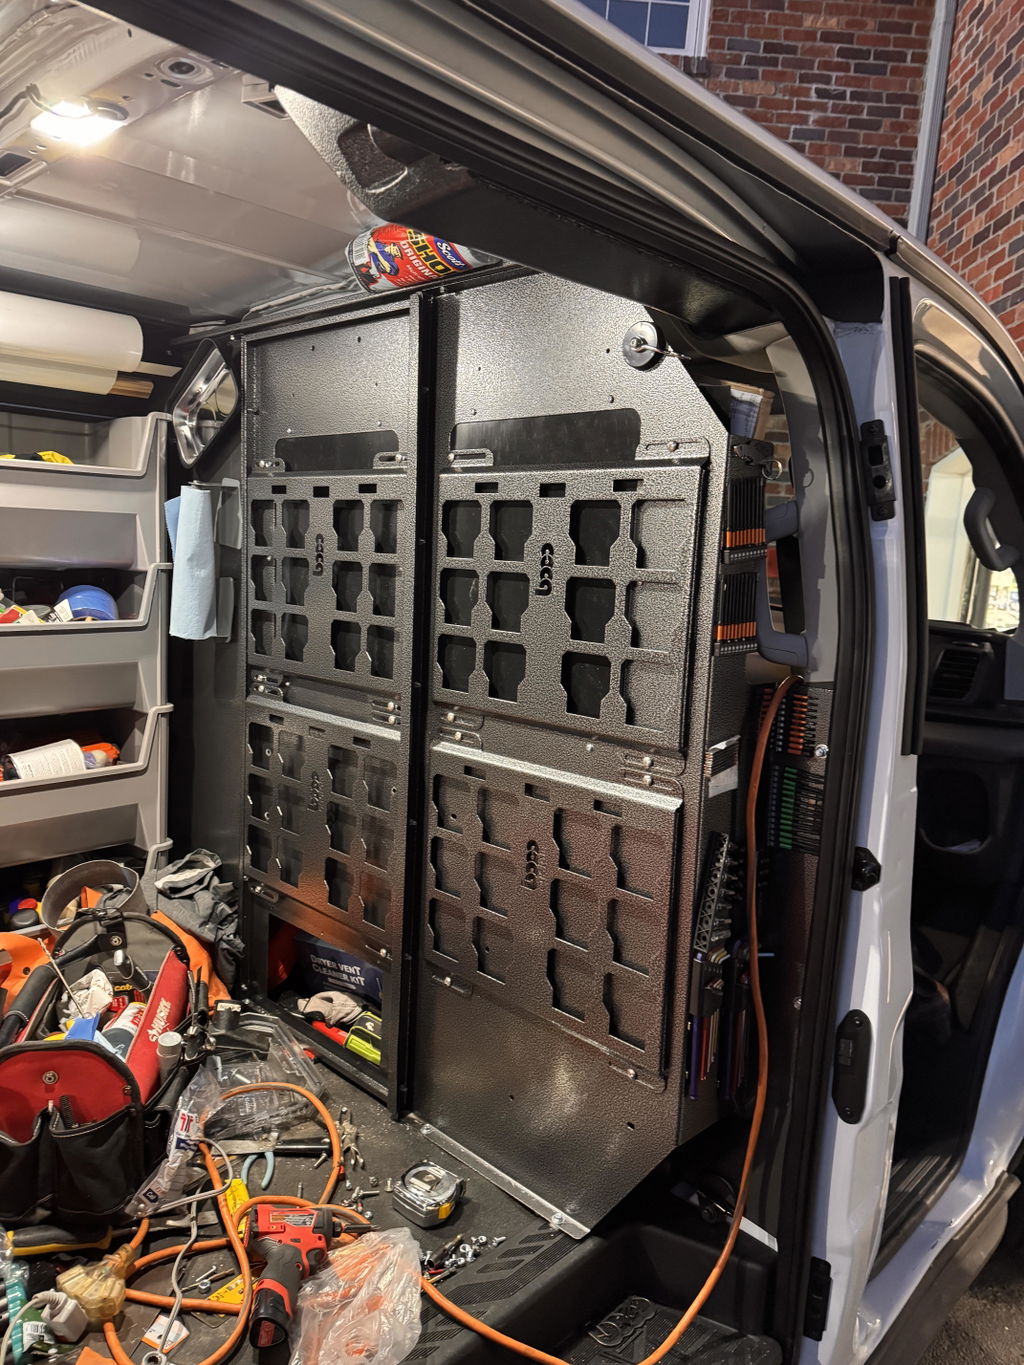
Curbside slider access is ideal for frequently used kits. Example: a low-profile plate at the slider with Packout-compatible brackets for impact/drill sets; bulkier compressors mounted on the forward floor near the bulkhead.
Sidewalls are suitable for lighter tool mounting solutions. Use OEM threaded inserts or add rivnuts/plusnuts with load-spreading doubler plates. Confirm wall deflection under load before committing.
Roof/ceiling is for light accessories only (cord reels, PPE bins). Avoid heavy items up high.
Pickup beds and toppers
Place plates on the bed floor just ahead of the wheel wells to keep weight near the axle. Tie into factory bed bolts or L-track/Unistrut anchored through the bed with sealed backing plates.
Tailgate access dictates layout. Keep frequently used cases within a 24–30 inch reach from the tailgate. Ensure tonneau/canopy clearance with low-profile mounts.
Service bodies: Mount inside compartments to floors, not thin skins. Use internal backing strips and verify door latch clearance.
Hardware and isolation
Use grade 8 (SAE) or 10.9 (metric) hardware with nyloc nuts or threadlocker. Add large fender washers or custom backing plates to resist pull-through.
Incorporate rubber isolators or gasket material between plate and body to reduce vibration, noise, and paint wear. Powder-coated, corrosion-resistant plates extend service life.
Customization for fit and function
Leverage DXF-based plates to align hole patterns with known tie-downs, add drainage/weep holes, or integrate slots for straps. Cutouts can clear rib peaks, floor steps, or E-track.
Map the mobile workshop setup with cardboard templates or painter’s tape, load the tools, and perform a brake/turn test. Adjust before final drilling.
Compliance and safety
Follow OEM upfitter guides, respect GVWR/GAWR, and keep clear of airbag modules. This approach yields professional tool storage that is secure, accessible, and serviceable while maximizing vehicle organization tips.
Drilling and Fastener Selection
Start with a layout plan. Use the plate itself as a drilling template or print a 1:1 DXF pattern to transfer hole locations accurately. Verify clearances underneath the floor or behind panels for fuel lines, wiring looms, airbags, and HVAC. Mark centers with a punch so bits don’t wander on curved ribs.
Drill clean, controlled holes. A 1/8 in (3 mm) pilot hole followed by a step drill produces round, burr‑free openings in automotive sheet. For clearance holes: 1/4‑20 bolts typically need 9/32 in (7.1 mm), 5/16‑18 need 3/8 in (9.5 mm), M6 needs 7 mm, and M8 needs 9 mm. Deburr both sides and seal exposed edges with primer or paint to prevent corrosion.
Match the fastener to the substrate:
Thin sheet metal (van walls, floors): Steel rivet nuts (rivnuts) or plus‑nuts are preferred over self‑tapping screws for heavy duty mounting. Follow the insert manufacturer’s drill size—e.g., many 1/4‑20 rivnuts require a 3/8 in hole; M6 often requires 9 mm. Set them square with a proper tool for maximum pull‑out strength.
Through‑bolting when accessible: Use bolts with large fender washers or a laser‑cut backing plate to spread load over ribs and prevent “oil‑canning.” This is ideal for high‑mass tool mounting solutions or where vertical shock loads are expected.
Plywood subfloors: Use T‑nuts from the underside with wide washers on top, and whenever possible also tie into steel ribs with additional anchors for a truly secure mounting plate installation.
Factory threaded points/Unistrut: If your vehicle provides M6/M8 bosses, use them with class 10.9 bolts and threadlocker.
Choose hardware for strength and longevity:
Bolts: Grade 8 (SAE) or class 10.9 (metric) for structural connections. Stainless 316 is corrosion‑resistant but lower in tensile strength; reserve it for non‑structural clamps or use with backing plates.
Nuts and retention: Nyloc or all‑metal locknuts, or wedge‑lock washers for high‑vibration service. Add medium‑strength threadlocker (blue) unless using nylon inserts.
Washers and plates: Oversized fender washers under nuts and heads reduce point loading. Backing plates significantly increase the safety margin in a mobile workshop setup.
Sealing and isolation: Use neoprene/butyl washers or seam sealer to keep water out. Add nylon or fiber washers between dissimilar metals to reduce galvanic corrosion.
Tightening best practices:
Use a torque wrench and follow bolt/grade charts; avoid “by feel” overtightening that can crush van sheet metal or spin rivnuts.
Re‑torque after the first week of driving and at regular service intervals.
Practical example: Mount a low‑profile plate over Transit floor ribs using six M8 steel rivnuts set in the flat sections between ribs. Deburr and paint holes, apply a thin bead of seam sealer under the plate, then install class 10.9 M8 bolts with nyloc nuts where through‑bolting is possible or wedge‑lock washers for inserts. This balances shear and uplift resistance for professional tool storage that stays put.
These vehicle organization tips create a robust foundation for tool mounting solutions and support the demands of heavy duty mounting in daily service work.
Applying Proper Torqueing Techniques
Consistent torque is what keeps a mounting plate seated through vibration, potholes, and hard stops. For secure mounting plate installation in service vehicles, focus on controlling clamping force rather than simply “tightening until it feels right.”
Start with the right hardware and prep
Match bolt grade to the load. Common choices: 1/4"-20, 5/16"-18, or 3/8"-16 Grade 5/8, or metric M6/M8 Class 8.8/10.9 for heavy duty mounting.
Use backing plates or large-diameter washers when fastening to thin sheet metal, drawer tops, or composite floors. This spreads load and preserves torque under dynamic forces.
Clean threads and mating surfaces. Remove paint overspray, powder coat overspill under washers, and debris that could “settle” later and reduce clamp.
Decide on dry vs. lubricated threads. Lubrication (oil, anti-seize) can reduce the torque required to reach the same clamp by 15–30%. Adjust accordingly.
For stainless hardware, use anti-seize to prevent galling; target torque must be reduced versus dry carbon steel threads.
Apply torque in controlled stages and patterns
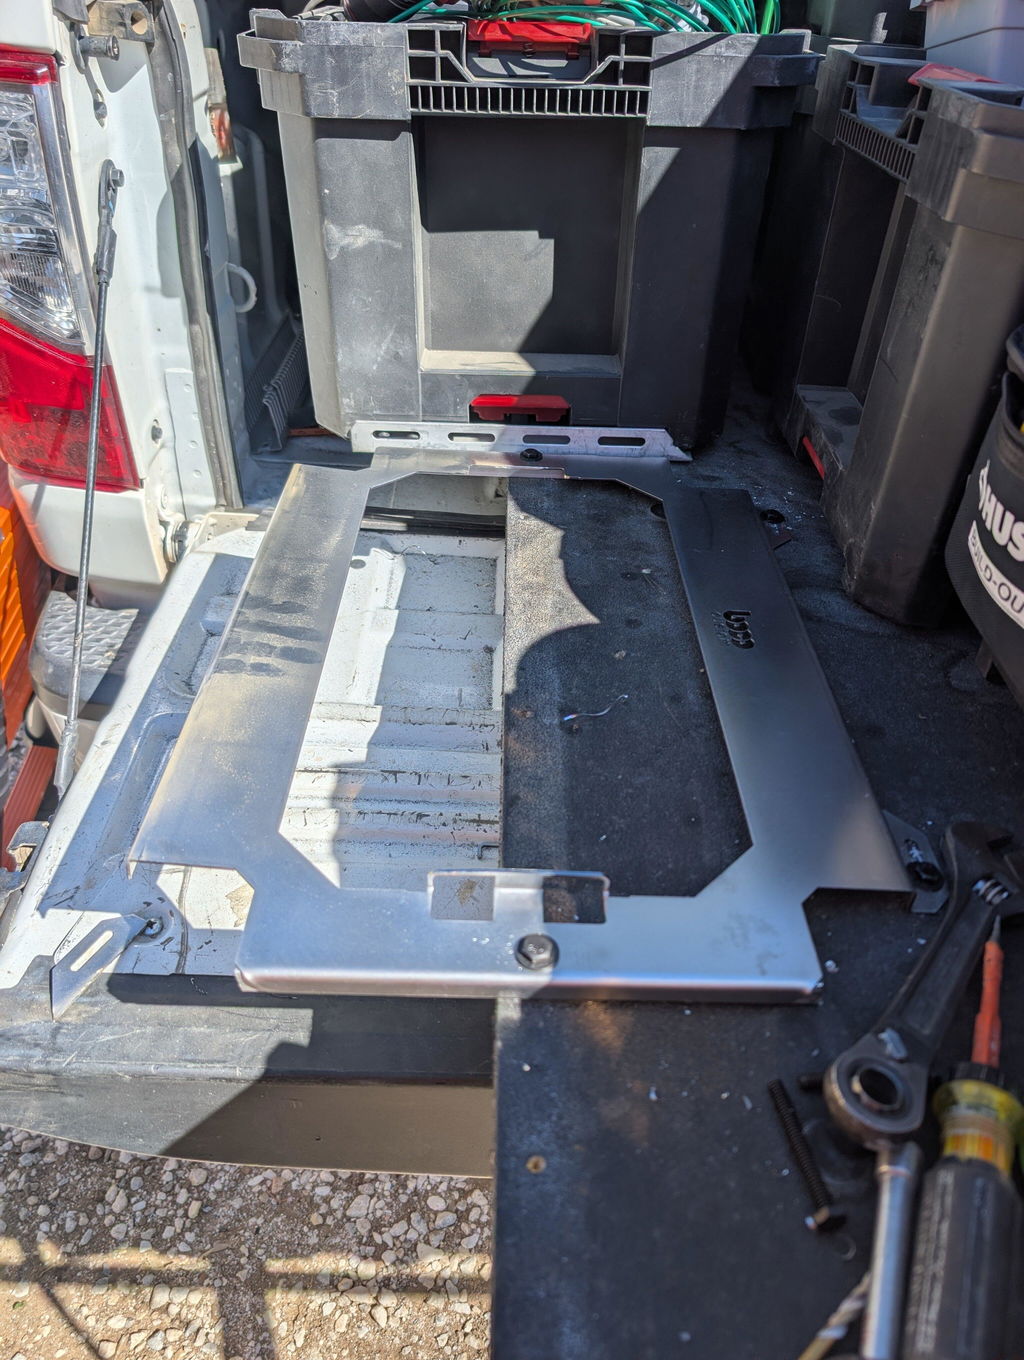
Illustration for Achieve Ultra-Secure Tool Organization: Best Practices for Mounting Plates in Service Vehicles
Snug all fasteners finger-tight to align the plate.
Tighten in a cross or star pattern to seat the plate evenly and prevent rocking, especially with low-profile tool mounting solutions.
Use staged tightening: 30%, 60%, then 100% of final torque.
Choose a torque wrench that places your target torque mid-scale for accuracy; calibrate annually and store click-type wrenches at the lowest setting.
M6 x 1.0 Class 8.8: ~10 Nm (7 ft-lb); Class 10.9: ~14 Nm (10 ft-lb).
M8 x 1.25 Class 8.8: ~24–26 Nm (18–19 ft-lb); Class 10.9: ~35–40 Nm (26–30 ft-lb).
Always verify against a manufacturer torque chart for your exact fastener, finish, and lubrication.
Lock it against vibration
Use prevailing-torque lock nuts (nylon insert or all-metal) plus medium-strength threadlocker where heat permits. Threadlocker needs clean, dry threads.
Avoid split lock washers as the sole anti-loosening method in mobile workshop setup; they’re less reliable under continuous vibration.
Where stainless or painted surfaces are involved, consider non-marring sealing washers; serrated flanges can bite coatings.
Special notes for rivet nuts and inserts
Set rivet nuts to the tool’s installation spec; do not exceed the insert’s spin-out strength when torquing the bolt. Use large flange or backing washers under the plate to limit localized crush.
Verify and re-torque
Paint-mark bolt/nut interfaces to detect movement.
Re-check torque after the first week of driving or ~100–200 miles, then at regular service intervals. This simple step keeps professional tool storage secure over the long term.
When fabricating from Boco Custom DXF files, size holes to the intended hardware and insert type to achieve repeatable torque without ovalizing or coating damage—key to a truly secure mounting plate installation and reliable vehicle organization.
Regular Maintenance for Sustained Security
Security doesn’t end after a secure mounting plate installation. Road vibration, temperature swings, moisture, and heavy daily use all work fasteners and coatings over time. A simple, repeatable maintenance routine keeps tool mounting solutions tight, quiet, and reliable—and prevents small issues from turning into costly downtime.
Start with an early recheck. After the first week of use or roughly 200–300 miles, inspect and re-torque all hardware. New installations settle as paint, powder coat, and gasket materials compress. Mark bolt heads with torque paint so any movement is obvious at a glance.
Adopt a regular inspection cadence:
Weekly: Quick visual check for loose hardware, rattles, and latch function. Tug-test modules and plates before driving.
Monthly: Re-torque fasteners, inspect mounting holes/slots for elongation, and examine the plate for signs of bending, cracking, or fretting.
Quarterly: Remove mounted modules to inspect the underside of plates and vehicle attachment points. Look for corrosion, paint damage, and sheet metal fatigue.
Prioritize hardware health. Use quality fasteners appropriate to the environment—zinc-plated Grade 8 for strength or stainless where corrosion is severe. Add nylon-insert lock nuts or prevailing-torque nuts, and a medium-strength threadlocker on clean, dry threads. If stainless-on-stainless is used, apply anti-seize to prevent galling. Replace any rounded or stretched hardware immediately.
Protect the finish. Heavy duty mounting plates are often powder-coated for durability. Chips expose bare metal, especially around fastener heads and cutouts. Touch up any coating damage promptly and consider a light corrosion inhibitor in winter or coastal regions. Where steel plates meet aluminum vehicle bodies, use isolator washers or barrier film to reduce galvanic corrosion.
Keep the system clean. Sawdust, metal shavings, and road grit trap moisture and abrade coatings. Vacuum debris from plate surfaces, drain channels, and around anchors. Make sure drain paths are open so water can’t pool under the plate.
Watch the load. Professional tool storage is dynamic—kits change and weights shift. In a mobile workshop setup, keep the heaviest items low and near the bulkhead, avoiding leverage that can loosen rear fasteners or distort the plate. If holes begin to oval or you see hairline cracks near high-load points, reduce weight at that location and repair or replace components.
For fabricators using DXF-based plates, deburr all edges, break sharp corners, and verify flatness before installation. Small high spots can relax over time and create bolt loosening. After coating, chase threads or use thread-cleaning tools to ensure accurate torque.
Document everything. Keep a simple log of torque checks, part replacements, and any adjustments. It’s one of the most effective vehicle organization tips for maintaining consistent performance over the life of your system.
Troubleshooting Common Installation Issues
Even well-planned installs can run into snags. Use these quick diagnostics and fixes to keep your secure mounting plate installation on track and your mobile workshop setup quiet, safe, and durable.
Plate rocks on ribbed or uneven floors
- Why it happens: Van corrugations, spray-in liners, or high spots prevent full contact.
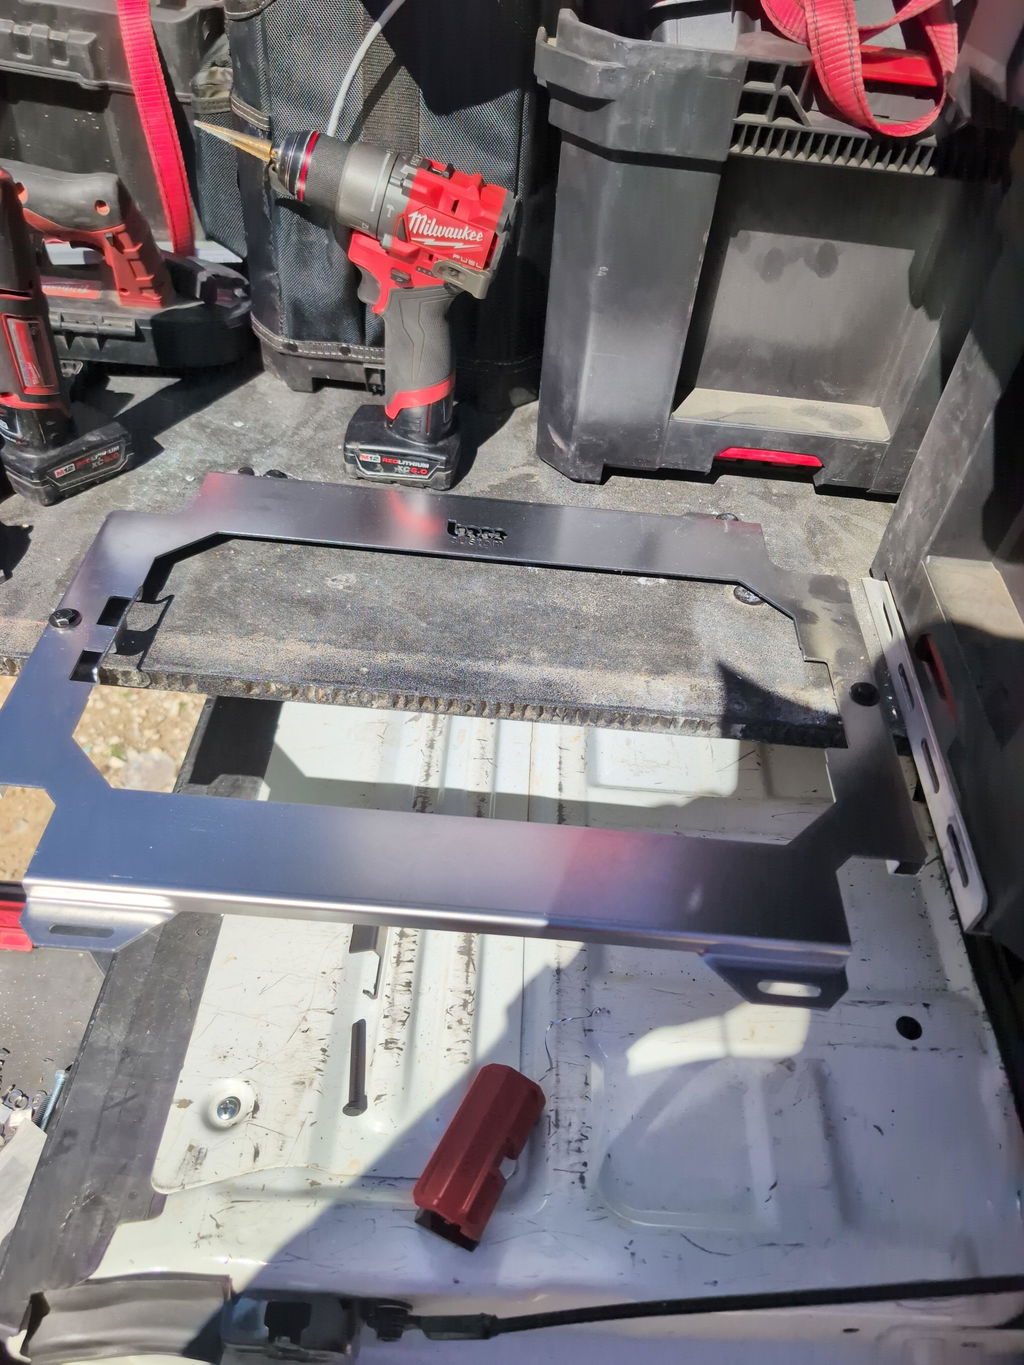
Illustration for Achieve Ultra-Secure Tool Organization: Best Practices for Mounting Plates in Service Vehicles
- Fix: Map high/low areas with a straightedge. Add EPDM or HDPE shims at low spots; avoid stacking washers that can loosen. Where ribs are deep, use stand-offs so fasteners don’t bend the plate. Confirm all corners sit flat before final torque.
Holes don’t line up with structure
- Why it happens: Misread templates, vehicle variances, or printing a template not to scale.
- Fix: Test-fit and center-punch through the plate before drilling the vehicle. If fabricating, verify DXF scale with a known dimension and account for kerf. Consider plates with slotted patterns for minor adjustment. For custom layouts, edit a DXF to match OEM tie-downs or frame rails.
Fasteners spin or pull out of thin sheet metal
- Why it happens: Using self-tappers or bolts without adequate grip length.
- Fix: Use rivnuts/plus-nuts sized to material thickness (M6/M8 are common in professional tool storage). In high-load zones, add backing plates or large-diameter fender washers under the floor. Follow fastener torque tables and use medium-strength threadlocker.
Rattles and squeaks after driving
- Why it happens: Micro-movement between metals and hardware relaxing after initial miles.
- Fix: Re-torque after the first week. Use nylon-insert nuts or serrated flange nuts. Add thin closed-cell foam or UHMW tape between plate and body to damp vibration. Confirm mounted modules latch fully; adjust latch height or add spacers to meet the locking geometry of your tool mounting solutions.
Corrosion or seized hardware
- Why it happens: Dissimilar metals and chipped coatings invite galvanic corrosion; stainless can gall.
- Fix: Isolate with nylon washers or barrier tape when mating aluminum and steel. Seal bare edges and touch up chips promptly. Use anti-seize on stainless-to-stainless threads.
Water intrusion through new holes
- Why it happens: Unsealed penetrations and capillary channels under plates.
- Fix: Deburr holes and seal with polyurethane or butyl. Use sealing washers or grommets where appropriate. Add underbody washers and sealant below the floor to stop splash ingress.
Interference with doors, drawers, or safety systems
- Why it happens: Tight clearances in service vehicles.
- Fix: Mock up with tape outlines and cycle doors and seat travel before drilling. Use low-profile hardware heads near sliding doors. Verify no wiring, fuel lines, or airbag components are beneath drill sites.
Load-induced flex or creep
- Why it happens: Concentrated weight on a small footprint.
- Fix: Distribute loads across more anchor points. Choose heavy duty mounting locations tied to ribs, crossmembers, or OEM anchors. For long spans, add sub-rails (L-track/Unistrut) beneath the plate.
Vehicle organization tips: document fastener sizes, locations, and torque values; keep a re-torque schedule; and photograph underfloor access points. When a layout is unique, instant-download DXF files let fabricators dial in precision so the final secure mounting plate installation fits first time and stays locked in under road abuse.
Standard shipping takes 5 to 7 business days. Express (2 to 3 days) and overnight options are available at checkout. Orders over $50 ship free.
Can I order online and pick up in store?
Yes. Select "Pick up in store" at checkout and choose your nearest location. Most orders are ready within 2 hours.
What if my order arrives damaged?
Contact us within 7 days of delivery with your order number and a photo. We'll arrange a replacement or refund, no return shipping required.
AI-Generated Content Disclosure
This blog post was created with the assistance of RankGPT, an AI-powered tool designed to generate high-quality, SEO-optimized content at scale.
As a small business embracing modern technology, we use AI to help us:
Produce informative articles more efficiently
Increase our online visibility through better performance in traditional search engines (like Google) as well as emerging AI-powered searches and answer engines
Reach more potential customers and grow our presence in a competitive digital landscape
By leveraging tools like RankGPT, we're able to publish valuable content more consistently and scale our efforts in ways that would otherwise take significantly more time and resources.
Important notes for readers:
While RankGPT helps create well-structured and relevant content based on current best practices, AI-generated posts are not always 100% accurate, complete, or free from errors.
The information, opinions, and perspectives expressed may not fully reflect the exact views, experiences, or official positions of Boco Custom, its team members, or the individuals involved in our business.
AI content should be viewed as a starting point or general resource—not as personalized professional advice, definitive facts, or a substitute for direct consultation with us or qualified experts.
We always recommend verifying important details independently, especially for decisions related to custom products, services, or any business matters.
We are committed to transparency and continually work to improve our content. If you have questions, feedback, or spot any inaccuracies, please reach out—we genuinely appreciate it!
Not only is this way overbuilt for the price with its solid, confident craftsmanship, I am completely convinced that these guys are the best around when it comes to the packout platform.
I like these, they are much more compact than what Milwaukee offers. I had them powder coated in silver vain and they look awesome. I love the bonus half rack they sent me. That’s the mark of a nice company.


Dejar un comentario