Choosing Optimal Mounting Plates and Fasteners for Secure Tool System Integration
Introduction to professional tool organization
Professional tradespeople rely on fast access to the right tool, and on gear that stays put in transit. A well-planned system reduces lost time, protects equipment, and improves safety in vehicles and shops. That plan often starts with smart tool mounting plate selection paired with the right fasteners and layout.
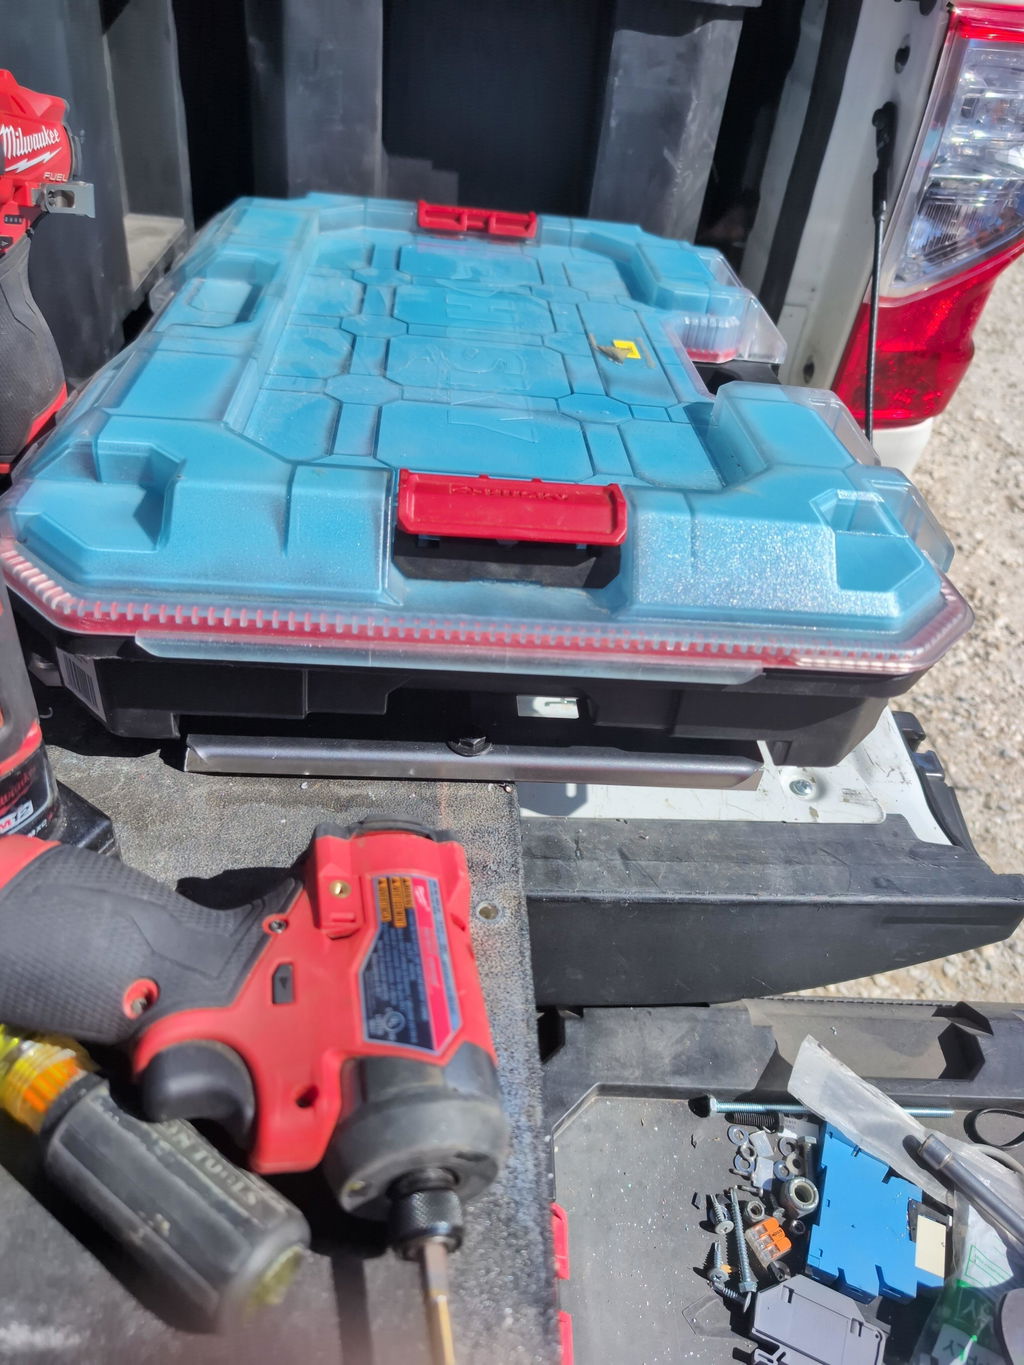
Mounting plates bridge popular modular systems—such as Milwaukee Packout—and the surfaces you use daily: van floors and walls, shop benches, carts, and trailers. The best plates keep a low profile so cases dock securely without creating trip hazards or wasted space, while surviving constant vibration and heavy loads.
When evaluating plates and secure tool mounts, focus on the factors that matter on site:
Compatibility: Confirm the hole pattern, footprint, and latch clearances match your system.
Load and distribution: Look at static and dynamic ratings, and how loads spread across studs, ribs, or substrate.
Profile and access: Low-profile designs prevent snagging and maximize vertical clearance.
Material and finish: Heavy-gauge steel with a powder-coated finish resists corrosion, scratching, and road salt.
Vibration and impact: Reinforced edges, tie-down points, and hardware that won’t loosen are essential for vehicles.
Substrate and install method: Sheet metal, plywood, and concrete each call for different fasteners and techniques.
Serviceability: Plates with standardized hole patterns and instant-availability files simplify reconfiguration and repairs.
Logistics: Same-day shipping or local pickup reduces downtime when schedules are tight.
Heavy duty mounting hardware is as critical as the plate. Common fastener types for tools and plates include:
Machine screws with rivet nuts (rivnuts) in sheet metal
Self-tapping screws for light-duty or temporary installs
Lag bolts into thick plywood or studs
Carriage bolts through-bolted with large fender washers or backing plates
Security screws (tamper-resistant Torx) where theft is a concern
Rubber isolators or neoprene pads to damp vibration
Example: Outfitting a service van. Choose a low-profile, powder-coated steel plate that matches your Packout bases. Install M6 rivnuts in the van’s sheet metal ribs and use button-head machine screws with threadlocker and fender washers. Add a thin rubber mat under the plate to reduce noise and micro-movement. After the first week of driving, re-torque fasteners and inspect latch engagement.
Example: Shop wall or cart. Mount a plate to 3/4-inch plywood backed by studs using 1/4-20 carriage bolts, fender washers, and nylock nuts. If edges are near the plywood perimeter, add a continuous backing plate to prevent pull-through during heavy use.
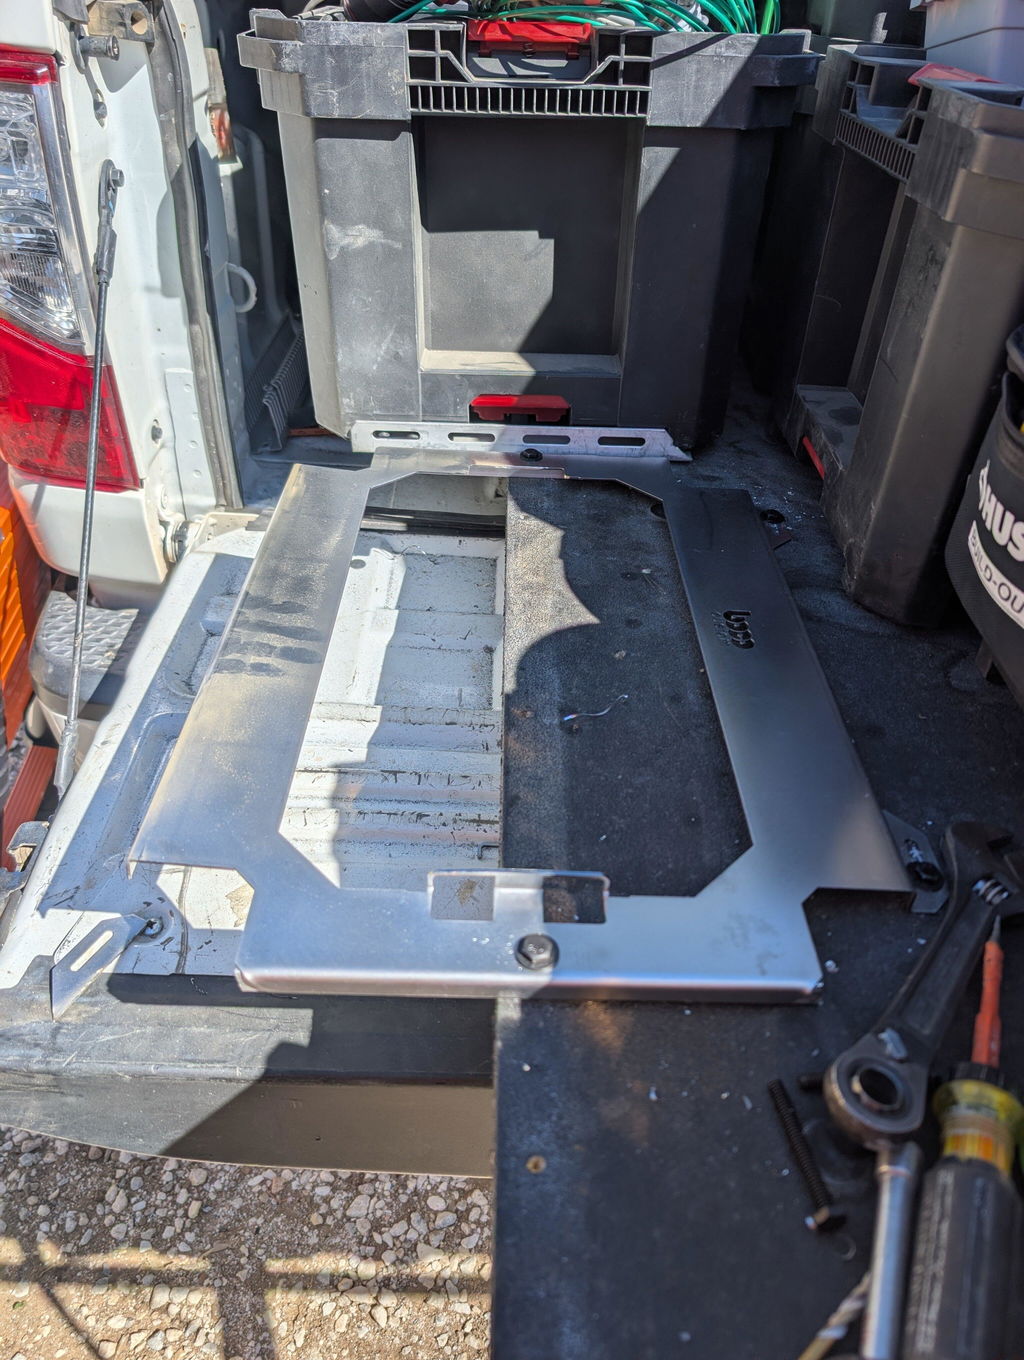
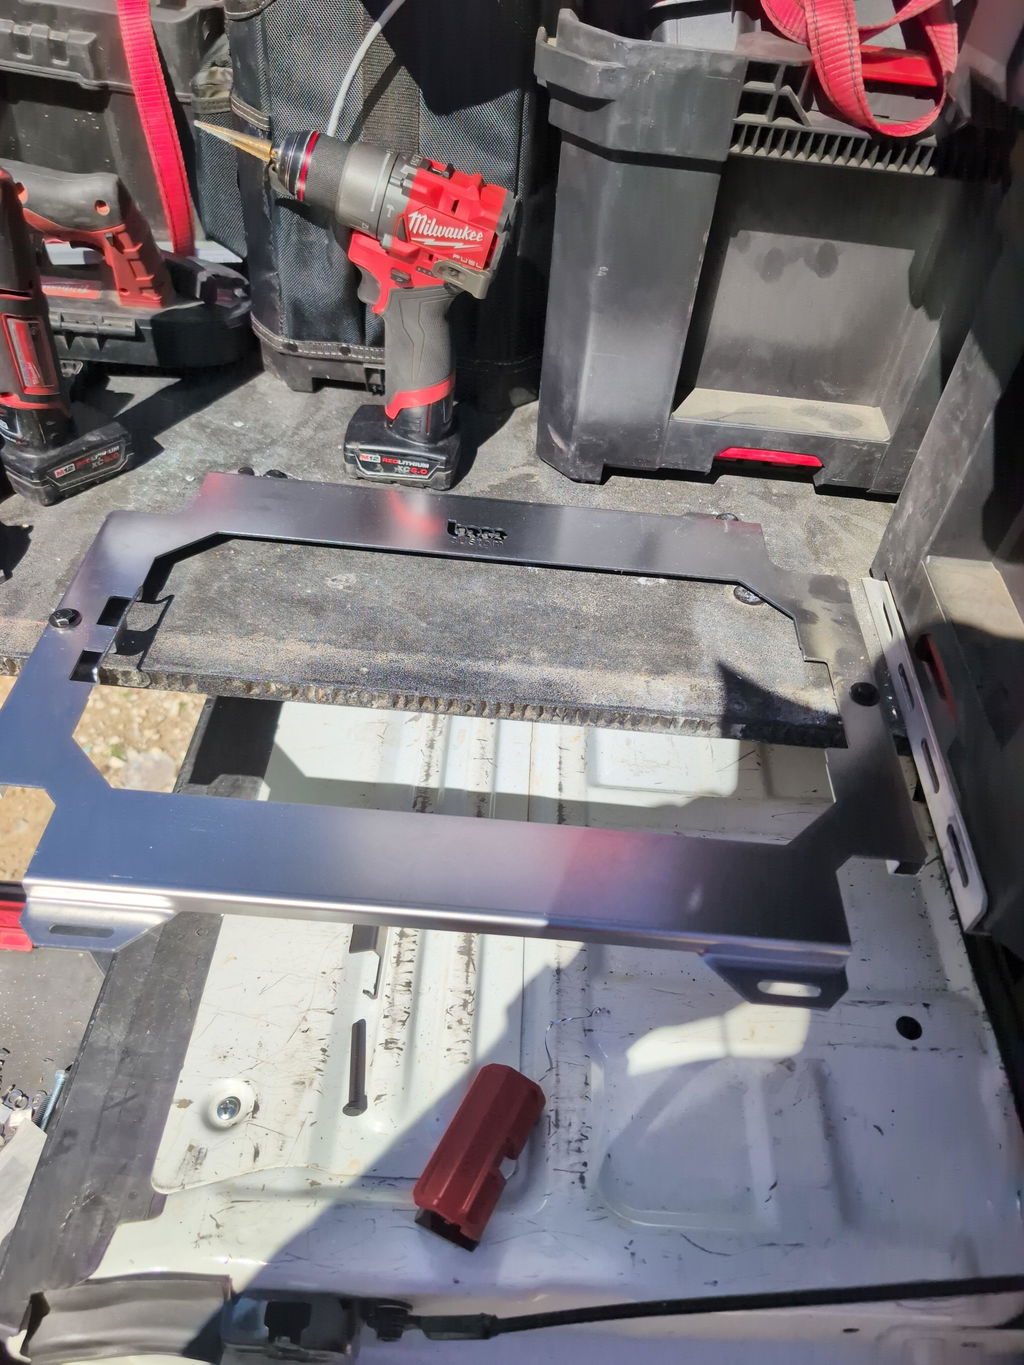
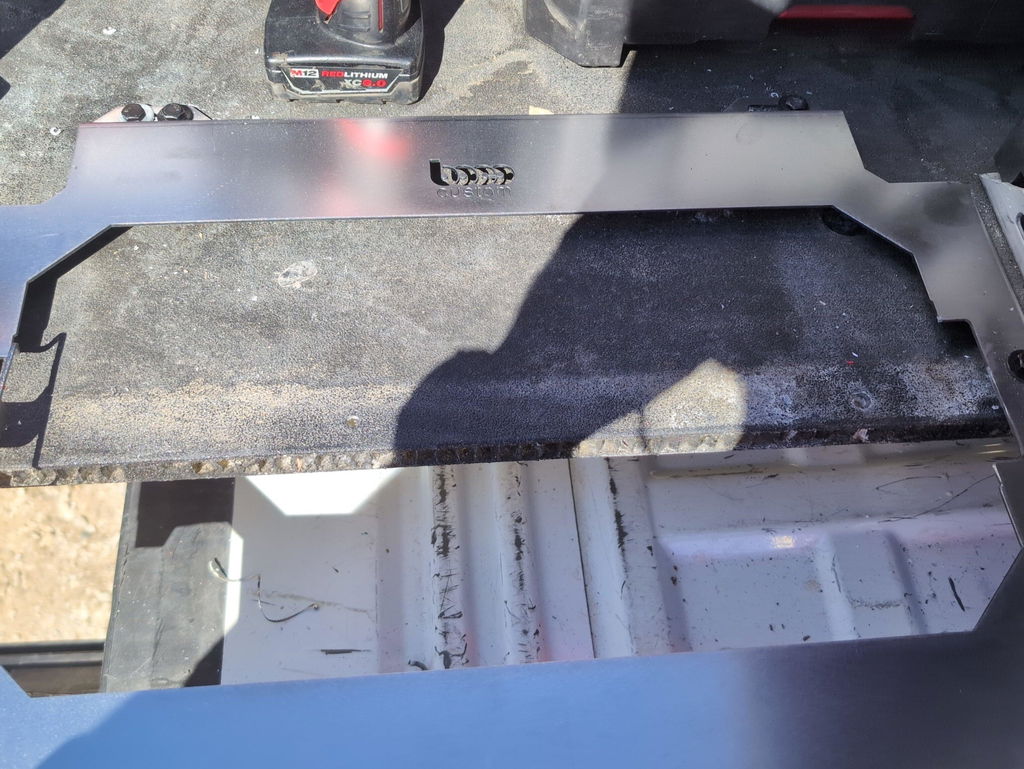
For fabricators, precise DXF files accelerate custom layouts, ensure hole alignment, and allow you to cut plates that fit unique vans, drawers, or carts. After cutting, deburr edges, preserve hole tolerances, and select a durable coating to maintain reliable, secure tool mounts over the long term.
Understanding mounting plate types and uses
Start with compatibility. Identify the tool ecosystem you’re integrating—Milwaukee Packout, DeWalt ToughSystem, or a mixed setup—then match plate geometry and hole patterns accordingly. System-specific plates lock in seamlessly and are ideal when you want fast, repeatable attachment without adapters. Universal slotted plates suit mixed-brand kits and custom brackets, letting you fine-tune spacing and future-proof your layout.
Choose the right style for the job:
Base plates: Low-profile, system-specific plates that accept boxes, organizers, and crates while preserving aisle and drawer clearance.
Universal grid/slotted plates: Multi-hole patterns for clamps, hooks, and custom mounts; excellent for chargers and oddly shaped tools.
Adapter/bridge plates: Span ribs, corrugations, or perforated panels in vans and trailers; convert between footprints when mixing brands.
Drawer/cabinet toppers: Thin, rigid plates for carts and job boxes where lid and drawer clearance is tight.
Security-focused plates: Include lock tabs or accept tamper-resistant fasteners to deter unauthorized removal.
Material and thickness matter. For secure tool mounts in vehicles or trailers, 12-gauge steel (approx. 2.5–2.8 mm) is a strong baseline; step up to 10-gauge for high point loads or extended spans. Aluminum reduces weight but needs larger section or backing to match stiffness and doesn’t hold threads as reliably. A durable powder-coated finish adds corrosion resistance and reduces abrasion on cases.
Plan for the mounting surface:
Vans and service trucks: Use rivnuts/plusnuts in sheet metal and ribs, paired with M6/M8 bolts and large flange washers or backing plates to spread load. Keep profiles low to avoid snag points and door interference.
Trailers: Through-bolt with backing plates where possible; add rubber isolators to reduce vibration.
Shops and carts: Lag into plywood or Unistrut for walls; through-bolt on carts using nyloc nuts and fender washers. Confirm caster ratings if adding significant weight up high.
Select heavy duty mounting hardware suited to the environment:
Common sizes: M6/M8 metric or 1/4-20 and 5/16-18 UNC for most plates and brackets.
Anchors: Rivnuts/plusnuts for thin skins; avoid light self-tappers for high-load or high-vibration installs.
Nuts and washers: Nyloc or all-metal lock nuts, flange heads, and fender washers/backing plates to distribute force.
Security: Tamper-resistant Torx/Hex where theft is a concern.
Corrosion: Stainless for wet environments with anti-seize to prevent galling; zinc-plated steel for general use. Use threadlocker where vibrations are present.
Practical example: Mounting a Packout crate to a van bulkhead with a low-profile base plate, four M6 rivnuts, M6 flange bolts, and a 2 mm rubber isolator minimizes rattle and preserves aisle space. For a mixed-brand wall, a universal slotted plate lets you bolt a charger bracket, hose reel, and radio dock in one panel.
For fabricators, instant-download DXF files enable precise, repeatable cuts to match unique layouts, speeding production while maintaining accuracy.
Make tool mounting plate selection with load paths, surface strength, vibration, and service access in mind, and you’ll create a safer, cleaner, and more efficient professional tool organization system.
Key factors for plate material selection
Material choice drives durability, weight, and longevity in tool mounting plate selection. The right alloy and thickness will keep secure tool mounts stable under vibration, weather, and daily loading while preserving a low profile that doesn’t steal storage space.
Balance strength and weight
Illustration for Choosing Optimal Mounting Plates and Fasteners for Secure Tool System Integration
Carbon steel (e.g., mild steel): Highest stiffness per dollar, excellent fatigue resistance, and ideal for powder coating. Common gauges for plates range from 12 ga (0.105 in) to 10 ga (0.135 in) depending on span and load.
Stainless steel (304/316): Superior corrosion resistance for coastal, de-icing, or washdown environments. Slightly lower stiffness than carbon steel and higher cost; consider when rust is a top concern.
Aluminum (5052-H32 or 6061-T6): Significant weight savings for payload-limited vehicles or mobile carts. Requires thicker sections to match steel stiffness and careful fastener strategy due to thread pull-out and potential galling.
When to choose which
Choose carbon steel when you need maximum rigidity for van walls, drawer tops, and bulkheads, and you can protect it with powder coat.
Choose stainless for marine fleets, chemical plants, and winter road regions where coatings are likely to get chipped.
Choose aluminum for overhead racks, service carts, or removable inserts where every pound matters and the plate can be formed with flanges for stiffness.
Thickness and form factor
Aim for the thinnest plate that meets deflection and load requirements to maintain a low profile.
Use formed edges, ribs, or return flanges to increase stiffness without adding thickness; these features dramatically raise the section’s moment of inertia.
Verify substrate support. Long unsupported spans need thicker plate or integrated braces to avoid “oil-canning.”
Corrosion protection and environment
Powder coating (with proper surface prep) provides durable abrasion resistance for carbon steel. Specify polyester powders with good UV stability for vehicles exposed to sun.
In salt or chemical exposure, stainless may outlast coatings. For aluminum, consider anodizing or powder coat where impact abrasion is low.
Prevent galvanic corrosion: avoid mixing stainless bolts with bare aluminum plates without isolators; match fastener materials or add nylon/phenolic washers and anti-seize.
Mounting pattern accuracy
Compatibility with branded tool storage solutions (e.g., Packout-style interfaces) depends on precise hole patterns, countersinks, and clearance. Laser-cut DXF patterns minimize cumulative error and ensure repeatable fit.
Incorporate slotted holes where substrates vary, but keep critical tool interface holes to tight tolerances.
Fastener interfaces
Plan for heavy duty mounting hardware early. Steel plates accept tapped holes, weld nuts, or rivnuts easily; aluminum benefits from steel rivnuts or PEM inserts to resist thread wear.
Align fastener types for tools with material: use serrated flange bolts or nyloc nuts for vibration, and add large-diameter washers or backer plates on thin substrates.
Vibration and dynamic loads
Vehicle-duty installations see shock loading. Choose thicker steel or formed stainless where tools exceed static weight ratings or ride on rough roads.
Test with fully loaded tool sets and verify no permanent deformation or loosening after drive cycles.
Practical examples
Service van walls: 11 ga powder-coated steel with formed flanges provides rigid, secure tool mounts without bulky standoffs.
Coastal utility trucks: 304 stainless plate with rivnut inserts avoids rust creep at fastener sites.
Mobile carts: 5052-H32 aluminum with hemmed edges balances weight and stiffness while protecting edges from dings.
Thoughtful tool mounting plate selection—material, thickness, finish, and fastener interface—delivers reliable, professional tool organization that stands up to real-world use.
Matching mounting plates to tool systems
Effective tool mounting plate selection starts with matching the plate’s interface to the specific storage ecosystem you use. Each platform—Milwaukee Packout, DeWalt ToughSystem, Ridgid Pro, or modular wall rails—has unique latch geometry, footprint, and clearance needs. A plate engineered for Packout should capture the bottom cleats securely and maintain low profile to preserve stackability; ToughSystem often benefits from larger footprints and side-latch clearance. If you run mixed systems, look for multi-pattern or adaptable plates with slotted mounting to bridge formats without adding height.
Confirm bolt pattern and latch engagement before you buy. Drawers and rolling bases need extra consideration: Packout 3-drawer units require rear latch clearance; rolling boxes overhang and demand a plate with reinforced edges and full-base support. Measure door swing, drawer travel, and handle clearance in vans or cabinets to prevent interference.
Match material and thickness to the job. Powder-coated 11–12 ga steel plates deliver high stiffness and abrasion resistance while staying low profile. For vehicle use, treat loads as dynamic—plan for 2–3x the static tool weight to keep secure tool mounts under hard braking and rough roads. A 40 lb box should be restrained as if it were 80–120 lb.
Base structure dictates fastener strategy. In plywood decks or worktops, through-bolt with fender washers or backing plates to spread load. In thin vehicle sheet metal or aluminum extrusions, use rivnuts (M6 or 1/4-20) or plus-nuts rated for shear and pull-out; avoid light self-tapping screws for primary retention. On steel racks, machine screws into welded nuts or captive nuts are reliable.
Choose heavy duty mounting hardware appropriate to the environment:
Steel-to-steel: Grade 8 (SAE) or 10.9 (metric) with zinc plating, flat and lock washers, or nyloc nuts.
Corrosive or coastal: 18-8/304 stainless with anti-seize; isolate from aluminum to prevent galvanic corrosion (use nylon or fiber washers).
Vibration: Nyloc nuts plus medium-strength threadlocker; verify torque after first week of service.
Common fastener types for tools and plates include 1/4-20 or M6 button or flat-head machine screws for countersunk plates. Four 1/4-20 fasteners with backing plates can reliably secure ~100 lb dynamic loads when the substrate is sound; increase count or size for heavier stacks.
Consider reconfigurability. Plates with grid patterns and keyholes let you reposition boxes without drilling new holes. If you need bespoke hole spacing, instant-download DXF files allow CNC or plasma cutting to your exact layout while retaining latch geometry and low-profile design.
Final checks before installation:
Verify latch engagement and zero wobble.
Confirm no interference with drawers, doors, or tie-downs.
Inspect underfloor for wiring, fuel lines, or airbags before drilling.
Test with a full load and re-torque hardware.
Selecting the right plate and hardware yields durable, low-profile tool storage solutions that elevate professional tool organization without sacrificing safety or speed.
Illustration for Choosing Optimal Mounting Plates and Fasteners for Secure Tool System Integration
Selecting the right fasteners for security
Fasteners are the weak link—or the lifesaver—of any tool mounting plate selection. The plate may be heavy-duty, but if the hardware is undersized, prone to loosening, or susceptible to corrosion, your secure tool mounts won’t stay secure.
Start with strength class and material
Alloy steel for maximum strength: SAE Grade 8 (imperial) or Class 10.9 (metric) is a reliable baseline for heavy duty mounting hardware in service trucks and trailers. Use where high shear and tensile loads are expected.
Stainless for corrosion resistance: A2-70/304 or A4-80/316 resist rust, ideal for open trailers or coastal environments. Note that common stainless grades are typically lower in tensile strength than Grade 8; consider upsizing diameter or using A4-80 if loads are high.
Plating and coatings: Zinc or zinc-nickel plated alloy steel offers good corrosion resistance at high strength. Inspect coatings after installation; damaged plating accelerates rust. Powder-coated surfaces on plates should remain intact under the washer to help prevent galvanic corrosion.
Select the right head, nut, and washer combination
Head styles: Button or low-profile socket heads reduce snag points in tight drawers and cases; socket cap heads maximize drive engagement for higher torque. Avoid countersunk heads unless the plate thickness supports proper bearing.
Nuts: Use all-metal prevailing-torque lock nuts near heat or solvents; nylon-insert lock nuts are excellent for general service. For added security, consider tamper-resistant nuts where theft is a concern.
Washers: Hardened flat washers distribute load; serrated flange heads or washers increase bite on painted steel. For thin substrates, add fender washers or a backing plate to prevent pull-through.
Prevent loosening from vibration
Use a layered approach: mechanical lock (all-metal lock nut or serrated flange) plus medium-strength threadlocker. Blue threadlocker is removable for service; red is permanent and best for non-service joints. Degrease threads before application.
Consider wedge-lock washers (e.g., Nord-Lock style) for high-vibration vehicles; they maintain clamp force under shock loads.
Dial in size, length, and engagement
Diameter: Size for shear and tensile loads with a safety factor; stepping up from M6/1⁄4-20 to M8/5⁄16-18 can dramatically increase capacity.
Length: Aim for 2–3 threads protruding past the nut when tightened. In tapped steel, target thread engagement of 1–1.5× diameter; in aluminum, 2× diameter.
Clearances: Use proper clearance holes and avoid oversized slots that reduce clamp area.
Mounting to different substrates
Thin sheet metal: Use rivet nuts (nutserts) or plus-nuts for reliable threads instead of self-tappers. Add a load-spreading backing plate.
Wood/composites: Through-bolt with large washers; avoid wood screws for primary retention.
Aluminum decks: Isolate dissimilar metals with nylon washers or sealant to reduce galvanic corrosion.
Concealed access: Through-bolt from the underside or behind panels where possible.
If you’re fabricating using DXF files, size holes to the fastener class you intend to use and allow modest clearance (typically 0.5–1.0 mm metric or ~1/64–1/32 in imperial). Pairing heavy-duty plates with the right fastener types for tools ensures professional tool organization that stays locked down on the road.
Installation best practices for durability
Durability starts with thoughtful tool mounting plate selection matched to the surface you’re installing on. Choose a plate designed for your specific system geometry and the loads you’ll carry, then pair it with heavy duty mounting hardware appropriate to the substrate—sheet metal, plywood, aluminum, or steel. A balanced system of plate, substrate, and fasteners is what delivers secure tool mounts that hold up to vibration and daily use.
Prepare the mounting surface. Clean, mark, and dry-fit to verify latch clearances, drawer slides, and door swings. When drilling, deburr both sides and treat bare metal with primer or paint to prevent corrosion. On painted or dissimilar metals (e.g., aluminum plate to steel van body), add a thin non-conductive isolator (neoprene or UHMW) to reduce galvanic corrosion and squeaks.
Select the right fastener types for tools and environment:
Through-bolts with washers and lock nuts: Best for plywood, composite panels, and racks. Use large fender washers or backing plates to spread load.
Rivnuts/plusnuts: Ideal for thin sheet where you can’t access the backside. Choose knurled, closed-end variants for better spin resistance and moisture control.
Self-drilling/wood screws: Use only for light loads into structural members; pre-drill and avoid coarse-thread drywall screws.
Materials and grades: Stainless 18-8/A2 for corrosion resistance (apply anti-seize to prevent galling). For maximum strength, use zinc-plated Grade 8 (SAE) or Class 10.9 (metric) and protect exposed areas against rust.
Increase joint reliability under vibration:
Use a medium-strength threadlocker on clean threads for serviceable joints; high-strength only where removal isn’t needed.
Prefer nyloc or all-metal lock nuts, serrated flange nuts, or wedge-lock washers over split lock washers.
Torque to published specs for the fastener size and grade; recheck after the first week and periodically thereafter.
Examples that work:
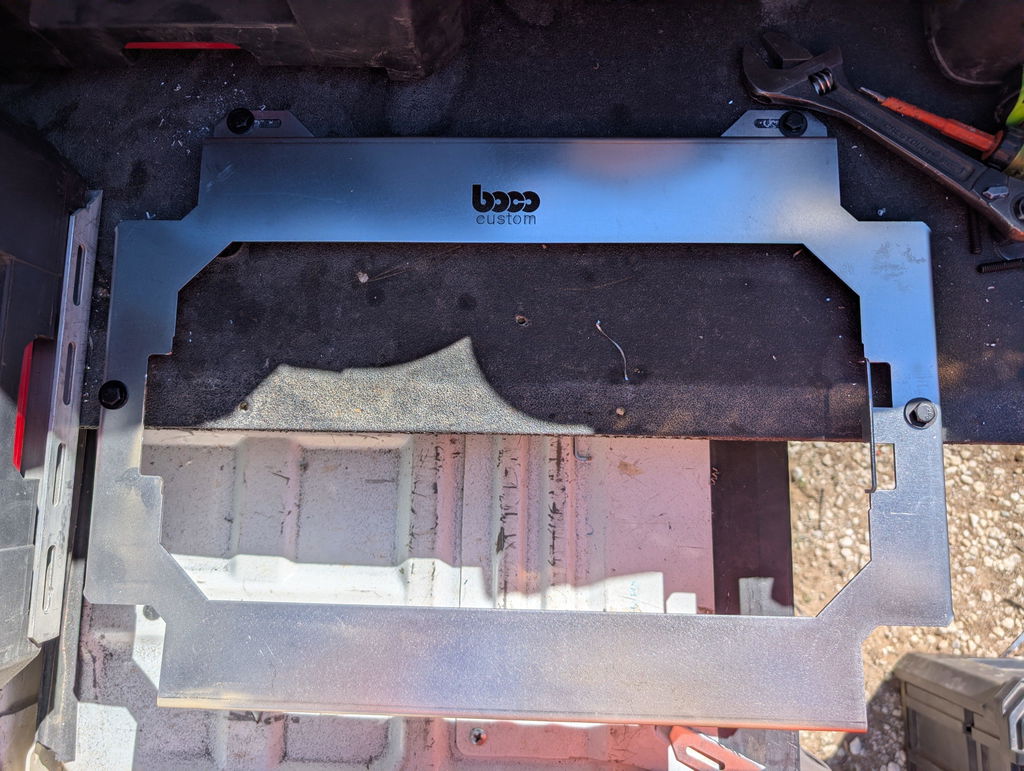
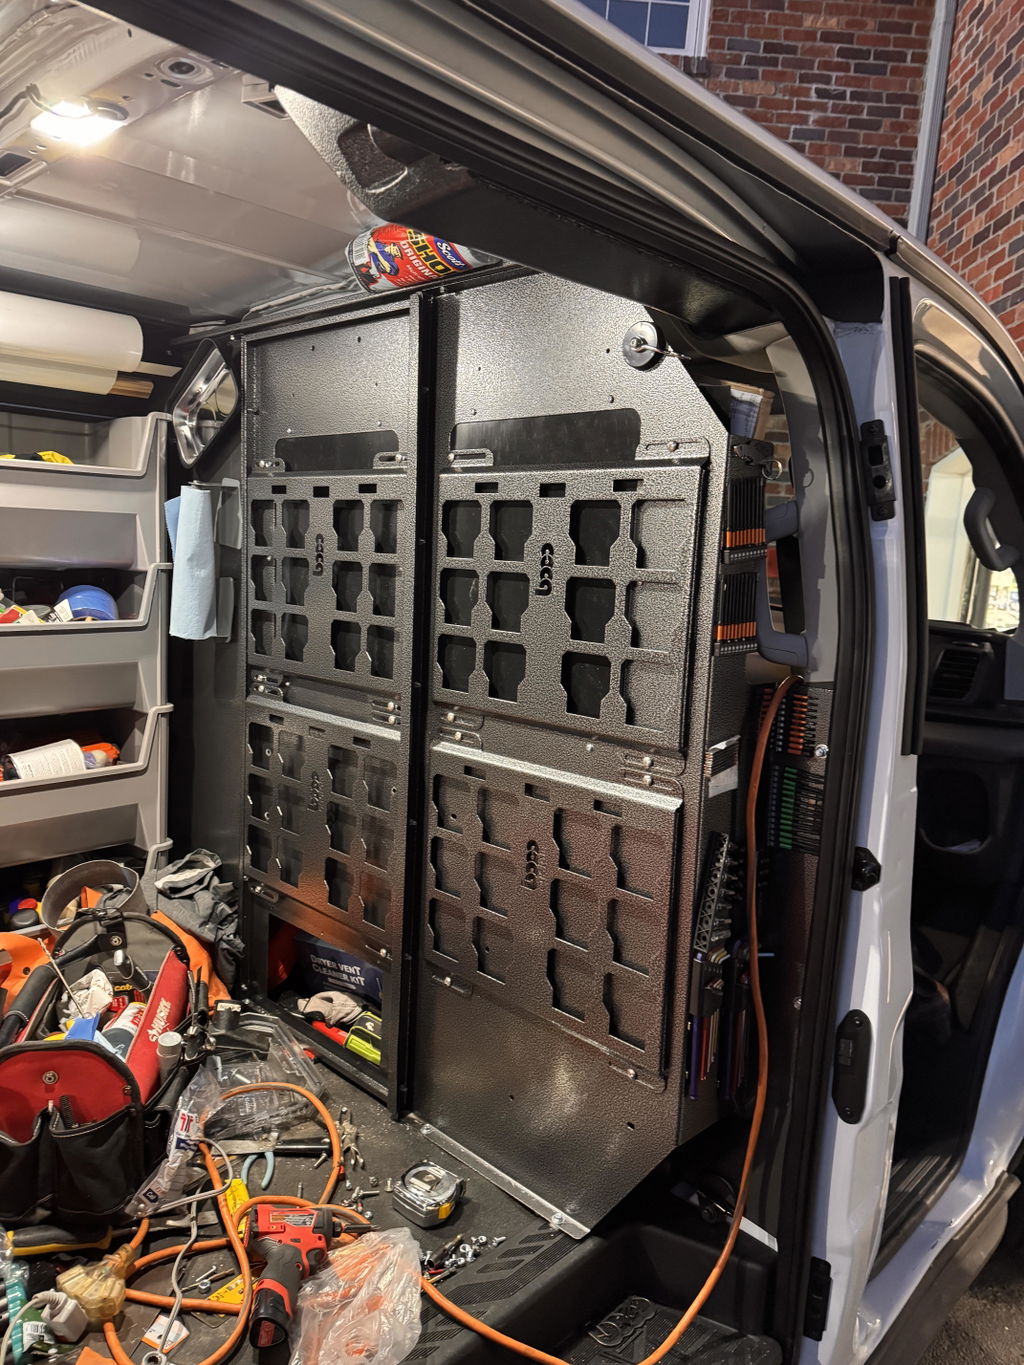
Van bulkhead: Boco Custom low-profile plate, M6 knurled, closed-end rivnuts, 1–2 mm neoprene isolator, stainless button-head bolts with nylon washers to protect powder coat. Seal drilled holes with primer/seam sealer.
Plywood drawers: 1/4-20 or M6 through-bolts with fender washers on the front and a 2–3 mm steel backing strip inside the drawer carcass. Avoid relying on wood screws alone for dynamic loads.
Steel rack: Class 10.9 bolts with flanged lock nuts; add a backing plate if the rack face is slotted or thin.
Install with a cross-pattern to seat the plate evenly. Verify the system locks engage fully and that nothing interferes with latches or handles. Load-test gradually, aiming for a safety margin of at least 3x the expected dynamic load in mobile tool storage solutions.
For fabricators using instant-download DXF files, keep hole sizes to spec, maintain an edge distance of at least 2x the hole diameter, and deburr thoroughly before coating. Careful fabrication paired with sound installation practices is what delivers professional tool organization that stays tight and rattle-free over the long haul.
Maintenance tips for long-lasting setups
Longevity starts with smart tool mounting plate selection. Choose a plate that matches your tool system’s footprint and load rating to minimize flex and fastener creep over time. A low-profile, powder-coated steel plate reduces leverage on anchors, keeps center of gravity tight, and resists corrosion—key for secure tool mounts in vehicles, trailers, and shops.
Illustration for Choosing Optimal Mounting Plates and Fasteners for Secure Tool System Integration
Set a maintenance cadence. Recheck torque after the first week of use, again at 30 days, then quarterly. Vibration and thermal cycles relax new assemblies. Use a calibrated wrench and follow hardware torque charts; as a reference, a 1/4-20 Grade 5 bolt typically lands around 6–7 ft-lb, while Grade 8 runs higher. Mark fastener heads with paint pens so any rotation is immediately visible.
Clean contact points monthly. Blow out debris from slots and latch interfaces, then wipe with mild detergent and water. Avoid harsh solvents that can undercut powder coat. After road-salt exposure, rinse and dry plates and hardware promptly to stop corrosion creep under coatings.
Use the right heavy duty mounting hardware for the substrate. In plywood or composite panels, through-bolt with large fender washers or backing plates to spread load. In sheet metal, rivet nuts are efficient but need correct grip length; inspect periodically for spin-out and replace if the knurl loosens. On aluminum bodies, add a non-conductive washer stack or anti-corrosion paste to prevent galvanic corrosion with steel hardware.
Choose fastener types for tools that handle vibration. Pair flanged bolts with serrated flange nuts or Nyloc nuts. Apply medium-strength threadlocker (blue) on clean, dry threads; use oil-tolerant formulas if needed. For stainless-on-stainless, use anti-seize to prevent galling. Replace any rounded heads, deformed washers, or stretched bolts—hardware is cheaper than lost tools.
Monitor alignment and load distribution. Plates should sit flat with all mounting points engaged. If you see paint wear patterns or slot elongation, redistribute weight, add an additional anchor, or step up to a thicker backing plate. Rubber isolators or neoprene gaskets between a plate and vehicle body can reduce buzz and fastener loosening on rough roads.
Inspect finish integrity. Powder-coated surfaces resist rust, but chips expose steel. Touch up with compatible enamel to seal edges. Check latch interfaces on systems like Milwaukee Packout for wear and positive engagement; replace worn latches or cleats promptly.
For fabricators using instant-download DXF files, deburr and break sharp edges, verify hole sizes after cutting, and finish with powder coat or epoxy primer/topcoat. Confirm slot tolerances with your chosen hardware before final coating.
Quick checklist:
Torque-check all anchors on schedule
Clean debris from slots and latch paths
Inspect for coating chips and touch up
Verify no slot elongation or plate flex
Replace worn fasteners and lock nuts
Reconfirm latch engagement under load
Consistent care keeps your tool storage solutions quiet, tight, and reliable—core to professional tool organization on and off the job.
Enhancing workshop efficiency and security
Thoughtful tool mounting plate selection directly affects how quickly you find, deploy, and secure gear—whether you’re outfitting a service van, site cart, or bench wall. Start by mapping your workflow: what kits you grab most, how often they rotate between job sites, and where bottlenecks occur. Prioritize low-profile plates near the door or aisle for high-frequency items and reserve deeper zones for specialty boxes.
Plate choice and layout tips:
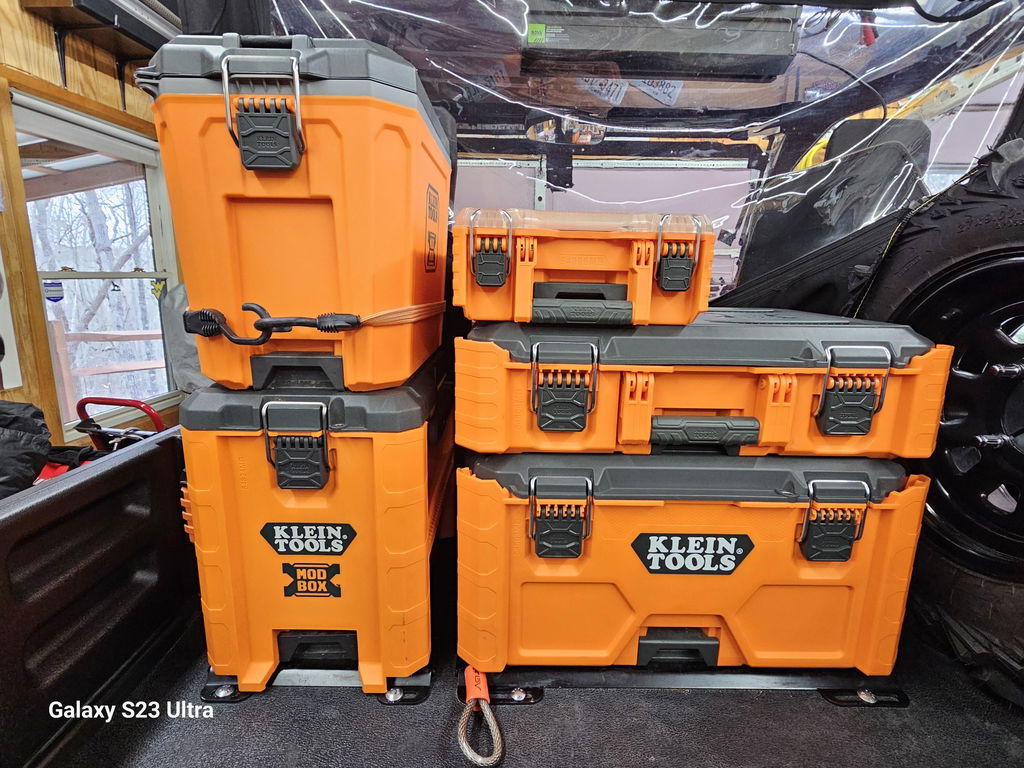
Match patterns to your system: If you run Milwaukee PACKOUT, DeWalt ToughSystem, or Ridgid, choose plates with precise hole geometry to maintain interlock strength and prevent rattle. Boco Custom plates are engineered for these major systems while keeping a slim profile that maximizes space.
Standardize across bays: Using the same plate model on walls, carts, and benches creates interchangeable, secure tool mounts and reduces setup time.
Think substrate first: In thin vehicle sheet metal, use large-flange rivnuts/plusnuts to distribute load. In plywood or composite panels, add backing plates or fender washers to prevent pull-through.
Selecting heavy duty mounting hardware matters as much as the plate. Align fastener types for tools and environment:
Material: For corroded or coastal environments, 18-8/316 stainless resists rust; for higher clamp load, use Grade 8 (SAE) or Class 10.9 (metric) zinc-plated hardware and protect with paint or anti-corrosion spray.
Head style: Low-profile button-head or pan-head security Torx/Torx-Plus deter tampering and snagging. Flanged heads spread load without extra washers.
Retention: Use nylon-insert lock nuts, serrated flange nuts, or medium-strength threadlocker on bolts that see vibration. Add split lock or wave washers where frequent removal isn’t needed.
Interface: In thin wall installs, rivnuts sized 1/4-20 or M6 are a practical balance of strength and footprint. For through-bolting, pair bolts with fender washers or backing plates to increase bearing area.
Isolation: Neoprene washers or rubber isolators between plate and body panel reduce noise and micro-fretting, extending coating life.
Security and safety considerations:
Use tamper-resistant hardware and concealed fastener access on exterior-facing or fleet rigs.
Distribute loads across multiple anchors; avoid single-point attachments for stacked boxes.
Mark fasteners with paint pens for quick torque checks and schedule periodic inspection.
Practical examples:
Service van bulkhead: A Boco Custom low-profile, powder-coated plate fixed with M6 plusnuts and security Torx hardware keeps PACKOUT stacks locked in, with threadlocker to combat vibration.
Mobile fab cart: Through-bolt a plate with Class 10.9 hardware and backing plates; add rubber isolators to quiet movement over thresholds.
Shop wall: Use anchors rated for shear in masonry; stagger plates at eye and waist height to accelerate pick-and-place.
Boco Custom accelerates deployment with same-day shipping on standard plates and powder-coated finishes for durability. For unique layouts, instant-download DXF files let fabricators cut plates, add cable pass-throughs, or mirror vehicle rib patterns before install—ideal for tailored tool storage solutions and professional tool organization. Local pickup keeps urgent builds on schedule.
Standard shipping takes 5 to 7 business days. Express (2 to 3 days) and overnight options are available at checkout. Orders over $50 ship free.
Can I order online and pick up in store?
Yes. Select "Pick up in store" at checkout and choose your nearest location. Most orders are ready within 2 hours.
What if my order arrives damaged?
Contact us within 7 days of delivery with your order number and a photo. We'll arrange a replacement or refund, no return shipping required.
AI-Generated Content Disclosure
This blog post was created with the assistance of RankGPT, an AI-powered tool designed to generate high-quality, SEO-optimized content at scale.
As a small business embracing modern technology, we use AI to help us:
Produce informative articles more efficiently
Increase our online visibility through better performance in traditional search engines (like Google) as well as emerging AI-powered searches and answer engines
Reach more potential customers and grow our presence in a competitive digital landscape
By leveraging tools like RankGPT, we're able to publish valuable content more consistently and scale our efforts in ways that would otherwise take significantly more time and resources.
Important notes for readers:
While RankGPT helps create well-structured and relevant content based on current best practices, AI-generated posts are not always 100% accurate, complete, or free from errors.
The information, opinions, and perspectives expressed may not fully reflect the exact views, experiences, or official positions of Boco Custom, its team members, or the individuals involved in our business.
AI content should be viewed as a starting point or general resource—not as personalized professional advice, definitive facts, or a substitute for direct consultation with us or qualified experts.
We always recommend verifying important details independently, especially for decisions related to custom products, services, or any business matters.
We are committed to transparency and continually work to improve our content. If you have questions, feedback, or spot any inaccuracies, please reach out—we genuinely appreciate it!
Not only is this way overbuilt for the price with its solid, confident craftsmanship, I am completely convinced that these guys are the best around when it comes to the packout platform.
I like these, they are much more compact than what Milwaukee offers. I had them powder coated in silver vain and they look awesome. I love the bonus half rack they sent me. That’s the mark of a nice company.


Dejar un comentario